Medial Patellar Luxation
Brian S. Beale, DVM, DACVS, Gulf Coast Veterinary Specialists, Houston, Texas
Overview
Surgical repair of medial patellar luxation is recommended for dogs having clinical signs of lameness. Patellar luxation is generally graded from 1 to 4, based on increasing severity. Grade 1 patellar luxations are generally not repaired but grades 2 through 4 are. Higher-grade luxations are more difficult to repair and more likely to recur. The main goals of surgical repair are to align the quadriceps mechanism (quadriceps muscle, patella, and patellar tendon) with the axial plane of the limb, to ensure adequate depth to the trochlear groove, to tighten redundant soft tissue lateral to the patella, and to release the tension caused by soft tissue attaching to the medial side of the patella. These factors should be evaluated and repaired in every patient undergoing surgical management of medial patellar luxation.
Many surgical options are available for repair of this type of injury. Be sure to consider the underlying problems associated with the particular luxation when choosing a surgical plan. Such problems include a shallow trochlear groove, misalignment of the quadriceps mechanism, and excessive laxity or tension of the joint capsule and retinacular tissues medially and laterally. The surgical options chosen should alleviate the underlying factor contributing to the luxation. For example, if a dog has good alignment of the quadriceps mechanism but a shallow trochlear groove, the surgical plan should include a technique to deepen the femoral trochlea but not to transpose the tibial tuberosity.
Step-by-Step: How to Repair Medial Patellar Luxation
Step 1
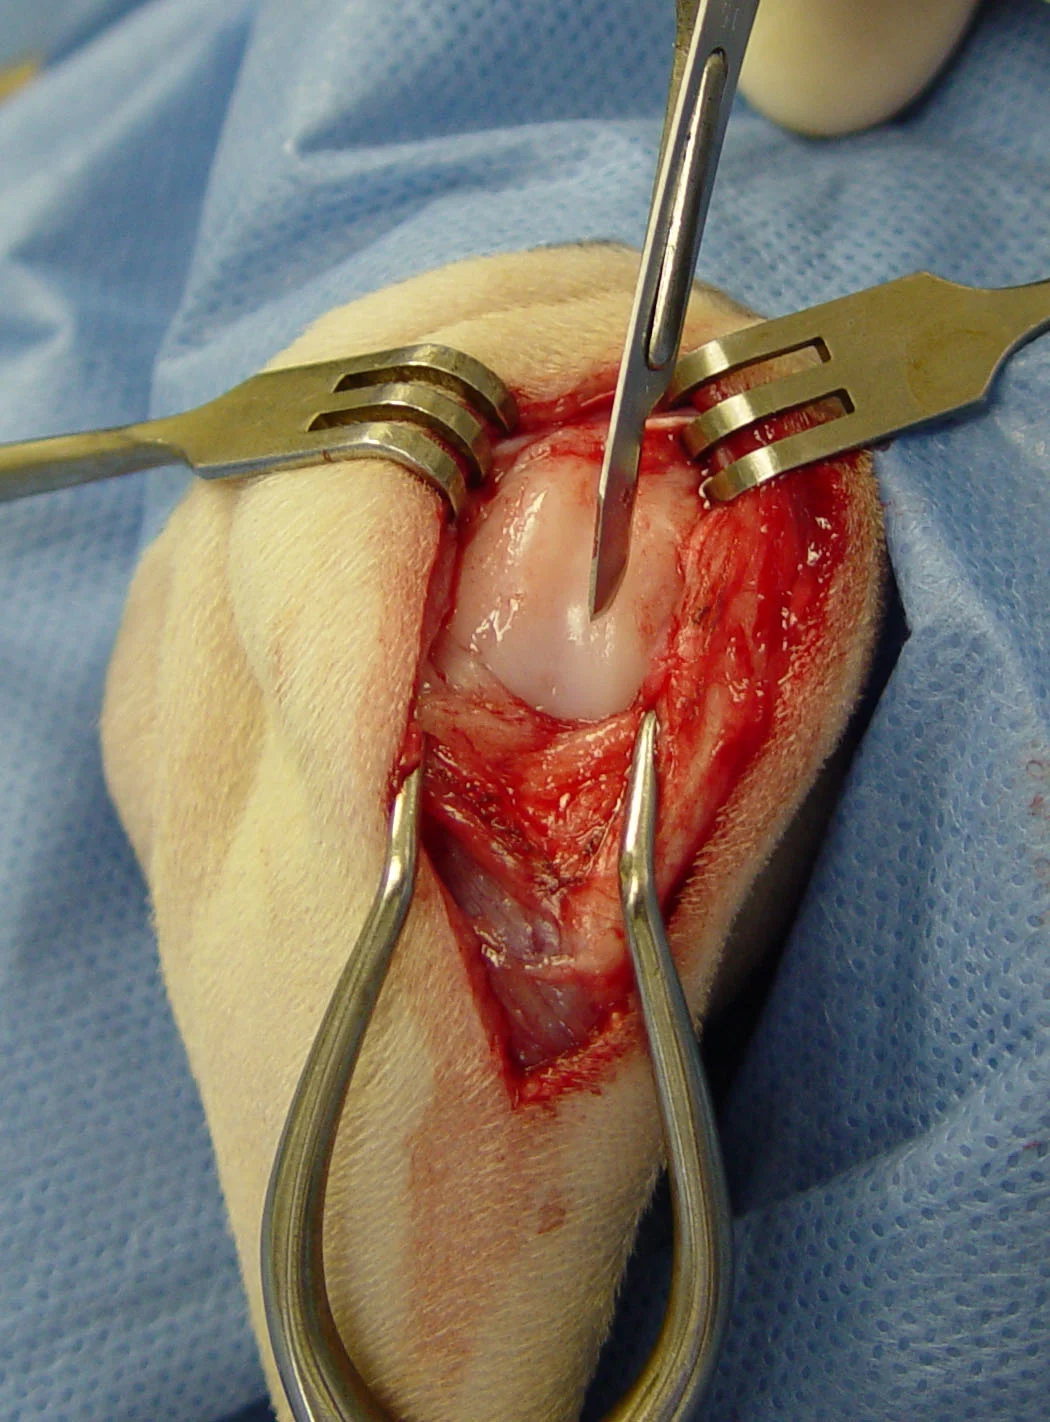
Surgical Approach
Place the patient in dorsal or lateral recumbency, with the limb being repaired up. A standard lateral parapatellar approach is recommended because it allows adequate exposure to correct a medial patellar luxation with trochleoplasty, tibial tuberosity transposition, medial release incision, and lateral imbrication. Make a curvilinear skin incision, centered over the lateral aspect of the stifle joint (Figure 1A). Incise the subcutaneous tissue and deep fascia on the same line, and perform lateral arthrotomy. Medially dislocate the patella to evaluate the depth of the trochlear groove (Figure 1B). Facilitate luxation of the patella by using a Gelpi retractor and incising the joint capsule to its most proximal extent. Use Senn retractors on soft tissue to improve visualization and prevent trauma to the tissue during trochleoplasty.
Procedure Pearl
The surgical options chosen should alleviate the underlying factor contributing to the luxation.

FIGURE 1A
Step 2
Stifle Joint Exploration
Be sure to evaluate the cranial and caudal cruciate ligaments and the medial and lateral menisci because medial patellar luxation can predispose these structures to tearing. Assess the patella for erosion and the patellar groove for adequate depth. The trochlear groove should normally accommodate approximately 50% of the depth of the patella. Dogs having medial patellar luxation frequently have a shallow trochlear groove and wearing of the medial trochlear ridge (Figure 2). Assess the position of the tibial tuberosity and the alignment of the quadriceps muscle, patella, and patellar tendon. Dogs having medial patellar luxation often have a medially displaced tibial tuberosity resulting in a malaligned quadriceps mechanism. Reduce the patella into the trochlear groove and assess the lateral soft tissue for redundancy and the medial soft tissue for tension and fibrous proliferation.

Step 3
Deepening the Trochlear Groove (Trochlear Block Recession)
The procedure is done with a fine-tooth, hand saw blade; a small osteotome; and a mallet. Start the cut perpendicular to the cartilage surface adjacent to the peak of one of the trochlear ridges using a scalpel blade. The incisions for the trochlear block are located just axial to the apex of the trochlear ridges. Score the cartilage with a scalpel blade to provide a track for the saw blade to run. This decreases the chance of accidental slippage and iatrogenic saw blade damage to the cartilage (Figure 3A).
Use the saw blade to begin cutting the trochlear block as defined by the scored cartilage. The cut should be carried deep enough to create a block that will include the entire trochlear groove (Figure 3B).
Procedure Pearl
The trochlear groove should normally accommodate approximately 50% of the depth of the patella.
Once the saw blade has engaged the subchondral bone, gradually redirect it perpendicular to the long axis of the bone. Make a cut into the lateral and medial ridge. Carry each cut to an adequate depth into the sulcus of the groove. Gently remove the block of cartilage and bone using an osteotome and mallet. Use an appropriately sized osteotome to cut the subchondral bone and elevate the trochlear block. The width of the osteotome should be equal or slightly less than that of the trochlear block. Start the cut just proximal to the intercondylar notch (Figure 3C), then direct the osteotome toward the proximal extent of the trochlear groove (Figure 3D).
Gently rap the mallet to advance the osteotome; this dislodges the trochlear block. Remove the trochlear block and carefully store it to avoid accidental discard. Further deepen the groove by removing a complimentary block of bone from the deep portion of the groove; this can be done by making a parallel cut with the osteotome or by cutting with a rongeur (Figure 3E). A portion of bone can also be removed from the underside of the trochlear block to further deepen the groove. Be careful not to drop the block when using this technique (Figure 3F). Replace the block, which contains the articular cartilage, and evaluate the depth of the trochlear groove (Figure 3G). Fixation of the block is not needed because of the pressure applied from the patella above and the congruency between the groove and block geometry. If necessary, place a large Steinman pin along the block and tap lightly with a mallet to seat the block more firmly into the groove.

FIGURE 3A
Trochlear Groove Deepening: 3 Methods
Three methods are commonly used to deepen a shallow trochlear groove: sulcoplasty, trochlear wedge recession, and trochlear block recession. No head-to-head comparison has been done to document whether one of these techniques is superior to the others.
Sulcoplasty is usually reserved for toy-breed dogs and cats. Trochlear wedge recession and trochlear block recession are preferred for small-, medium-, and large-breed dogs, but can also be done effectively in toy-breed dogs and cats with a slight increase in technical difficulty. I prefer trochlear block recession in all patients (Step 3).
Trochlear wedge recession is similar to trochlear block recession except that a V-shaped piece is removed from the trochlear sulcus rather than a block-shaped wedge. Trochlear block recession allows a deeper sulcus proximally, which may provide better biomechanical stability of the patella when the stifle joint is extended. It is effective but technically more demanding than sulcoplasty.
Step 4
Aligning the Quadriceps Mechanism
Transposition of a tibial tuberosity is a simple and effective method for aligning the patellar mechanism in patients with an abaxially displaced tibial tuberosity. If the tuberosity is displaced medially, luxation occurs medially; therefore, the tuberosity must be transposed laterally and secured.
For osteotomy of the tibial tuberosity, position the osteotome caudal to the insertion of the patellar tendon on the tibial tuberosity. Direct the osteotome slightly medial toward the distal extent of the tibial tuberosity and then advance it with light raps using a mallet. The distal attachment of the tuberosity should remain intact (Figure 4A).
Procedure Pearls
Be sure to evaluate the cranial and caudal cruciate ligaments and the medial and lateral menisci because medial patellar luxation can predispose these structures to tearing.
One of the most common reasons for failure of surgical repair of medial patellar luxation is failure to perform a tibial tuberosity transposition.
Transpose the tuberosity laterally until the patella and patellar tendon lie in the axial plane of the femur and tibia, then stabilize with a pin ranging from 0.035 to 0.078 inches depending on the size of the patient. Add a second pin or tension band if additional stability is required (Figure 4B).
To encourage bony healing, the cortical surface of the tibia can be abraded before reattaching the tuberosity. If possible during the osteotomy, leave the distal cortical bone intact to act as a tension band against the pull of the quadriceps mechanism. If the tuberosity is freed completely, it is prudent to secure the transposed bone with a pin and tension band or a lag screw. Transpose the tuberosity to a position that restores axial alignment to the quadriceps mechanism.

FIGURE 4A
Step 5
Releasing the Medial Retinaculum
Make a medial releasing incision if fibrous hyperplasia has occurred medially after prolonged or severe medial patellar luxation. Make the incision through the retinacular tissue in a medial parapatellar location to release tension on the patella (Figure 5). Continue the incision proximally to include the insertion of the sartorius muscle and the medial head of the quadriceps to relieve additional medial tension on the patella. The incision occasionally has to be carried deeper to include the joint capsule if marked joint capsular fibrosis has occurred, creating excessive medial restraint. Leave the incision open; do not suture.

Step 6
Imbricating the Lateral Retinaculum
Lateral imbrication is performed with correction of a medial patellar luxation as a means of creating lateral restraint. A vest-over-pants pattern is ideal for this technique (Figure 6). The stretching of the lateral joint capsule and retinaculum occurs chronically with longstanding patellar luxation. Occasionally, a traumatic luxation may cause rupture of these tissues. Imbrication is also a good technique for repair in this case and is usually performed using heavy, absorbable, monofilament suture placed in a vest-over-pants or horizontal mattress pattern. Take care not to tighten the retinaculum excessively (especially if a medial retinacular releasing incision has been performed), because it is possible to create an iatrogenic lateral patellar luxation.

Step 7
Postoperative Period and Rehabilitation
Place a soft-padded bandage for 2 to 5 days to reduce swelling, decrease pain, and prevent self-trauma to the incision. Prolonged bandaging is not necessary and can actually slow recovery due to ensuing stiffness of the joint. Early return to weight-bearing and light activity is encouraged. Exercise should initially be limited to short, slow walks and range-of-motion exercise. Rehabilitation ideally should incorporate strength, postural, and flexibility exercises. Return to full activity is generally not permitted for approximately 2 months.
Procedure Pearl
After surgery, early return to weight-bearing and light activity is encouraged, but exercise should initially be limited to short, slow walks and range-of-motion exercise.