Wound Drain Placement
Eric R. Pope, DVM, MS, DACVS, Ross University
Drains are sometimes necessary for managing fluid accumulations or prophylactically when postoperative fluid accumulation is likely due to dead space or wounds in high-motion areas. Although drain placement can be beneficial, drains increase the risk for infection in clean wounds, as they are foreign bodies and interfere with normal host defense mechanisms.1,2 Drains are categorized as passive or active.
Passive (ie, open) drains draw fluid from the wound via a combination of a typically higher pressure in the wound in combination with gravity and capillary action along the drain surface.1,3 Dependent drainage must be established for these drains to work effectively. The most common passive drain used in veterinary medicine is the Penrose drain, which is composed of soft latex or silicone tubing and available in widths from ¼ in to 1 in. Because fluid flows along the outside of the drain rather than through it, fenestrating Penrose drains decreases their effectiveness. Tubing with stiffer walls can be used but offers no real advantage because the fluid still flows along the drain surface. Passive drain materials are readily available and typically cost less than active drainage systems but are less efficient in evacuating fluid and may cause skin irritation at the exit site due to moisture accumulation. In addition, sterile dressings used to cover the drains may need to be changed multiple times daily, depending on the amount of drainage, and can quickly offset the initial lower cost.
Active drains (ie, closed suction drains) are preferred by many veterinary surgeons because they are more efficient in removing wound fluid, can be exited wherever it is convenient to secure the drainage reservoir, and have a significantly low risk for skin irritation at the tube exit site.1,3 Disadvantages include increased cost and complications that can affect drain performance and require interventions to maintain optimal function. Active drainage systems can be homemade or commercial.
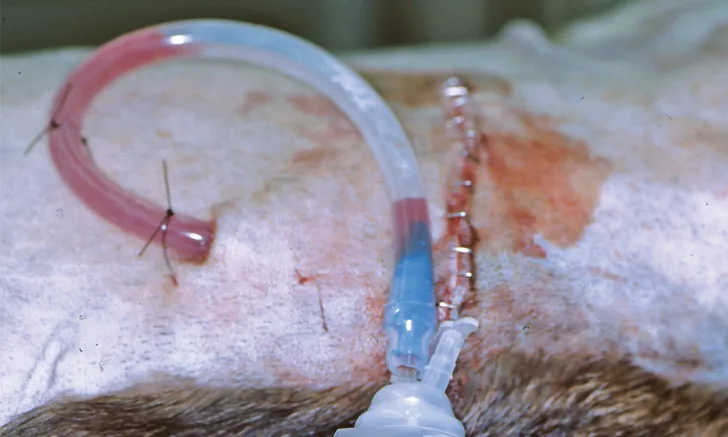
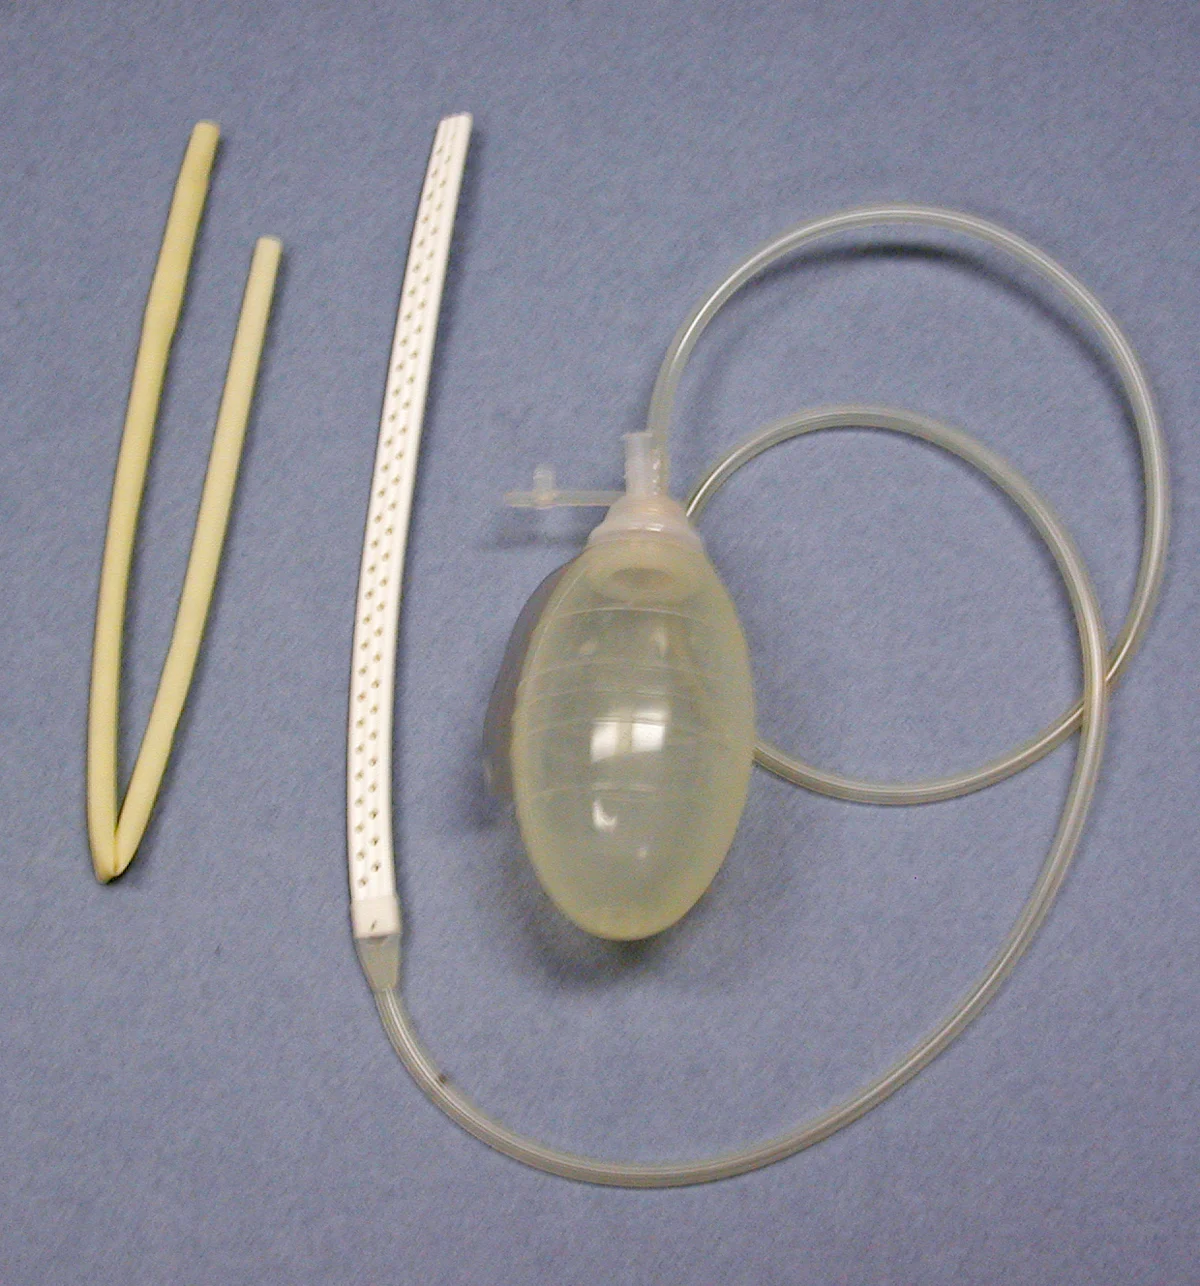
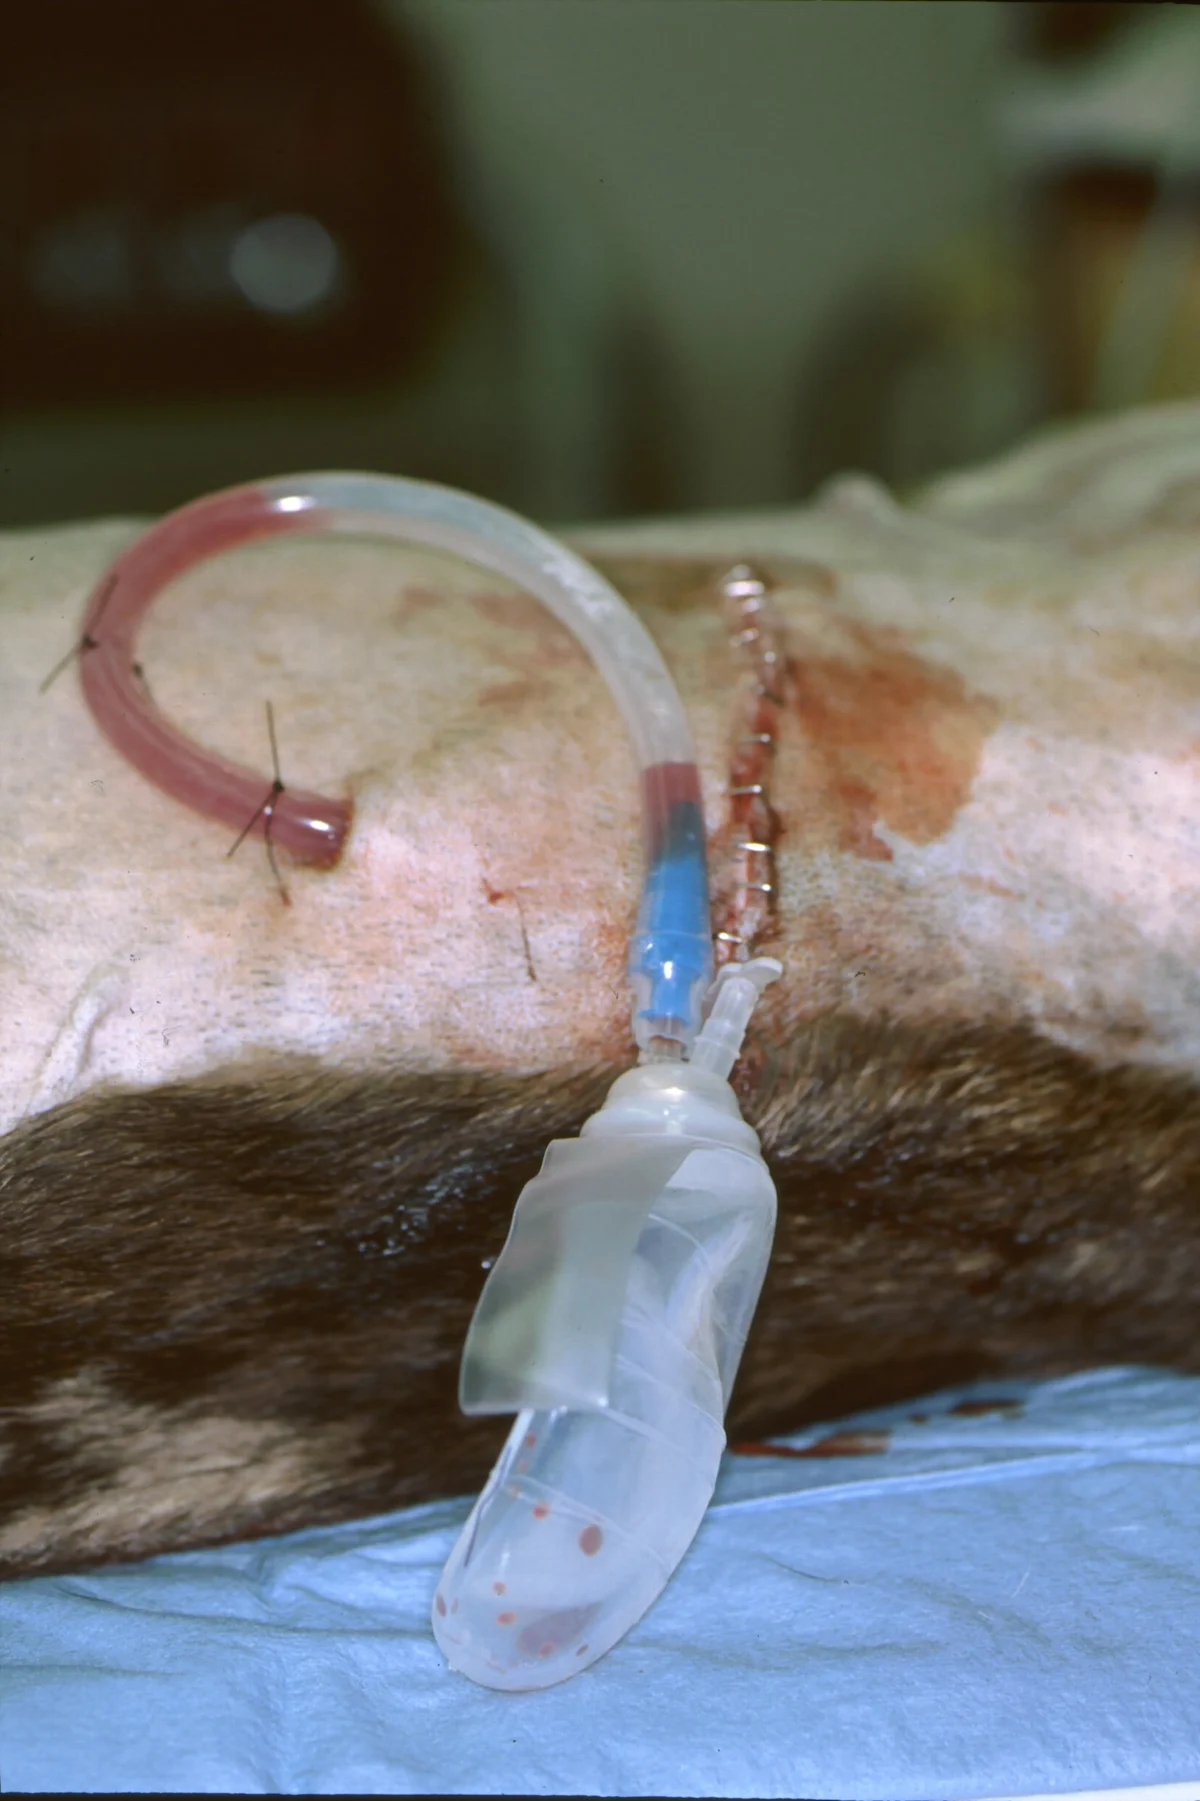
The Jackson-Pratt drainage system is commonly used in veterinary medicine. An alternative is to buy bulk rolls of silicone rubber tubing that can be cut to any length and sterilized. Fenestrations are cut into the distal end of the drain with scissors (Figure 1A); the drain is then attached to a Jackson-Pratt (grenade) reservoir that can be purchased separately. Large syringes can also be used as drainage reservoirs (Figure 1B). An 18-g or larger needle can be used to create a hole(s) along the plunger. The syringe can be attached to the drain. Negative pressure can be established by pulling back on the plunger, and the blunted needle can be placed through the hole(s) in the plunger to maintain the suction. Active drains for small wounds can be made using butterfly catheters and blood collection tubes (Figure 2). The reservoir can be emptied or the blood collection tubes can be replaced when more than half-full to maintain adequate suction. If the reservoir does not have a one-way valve, the tubing can be crimped when emptying it to prevent fluid in the drain tube from flowing retrograde back into the wound. Placement of an active drain after excision of a large intermuscular lipoma in the thigh of a dog is shown in Figure 3.
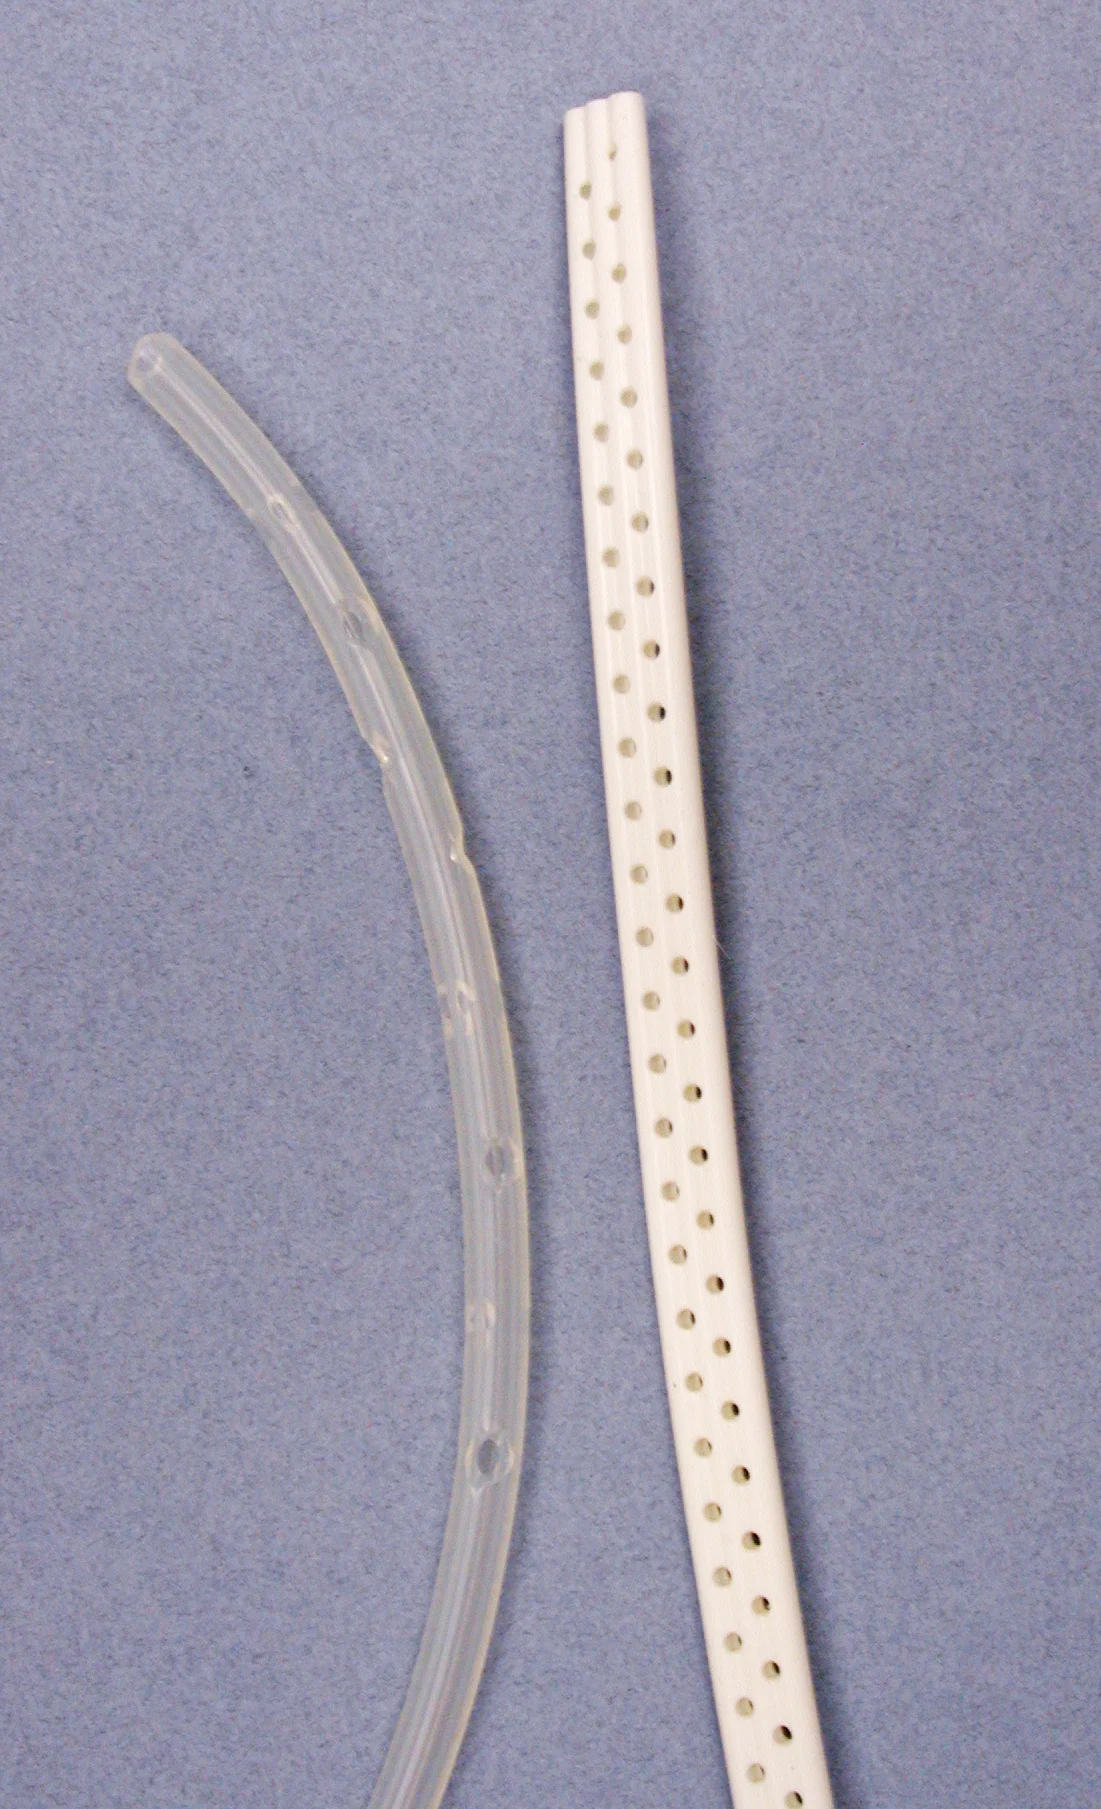
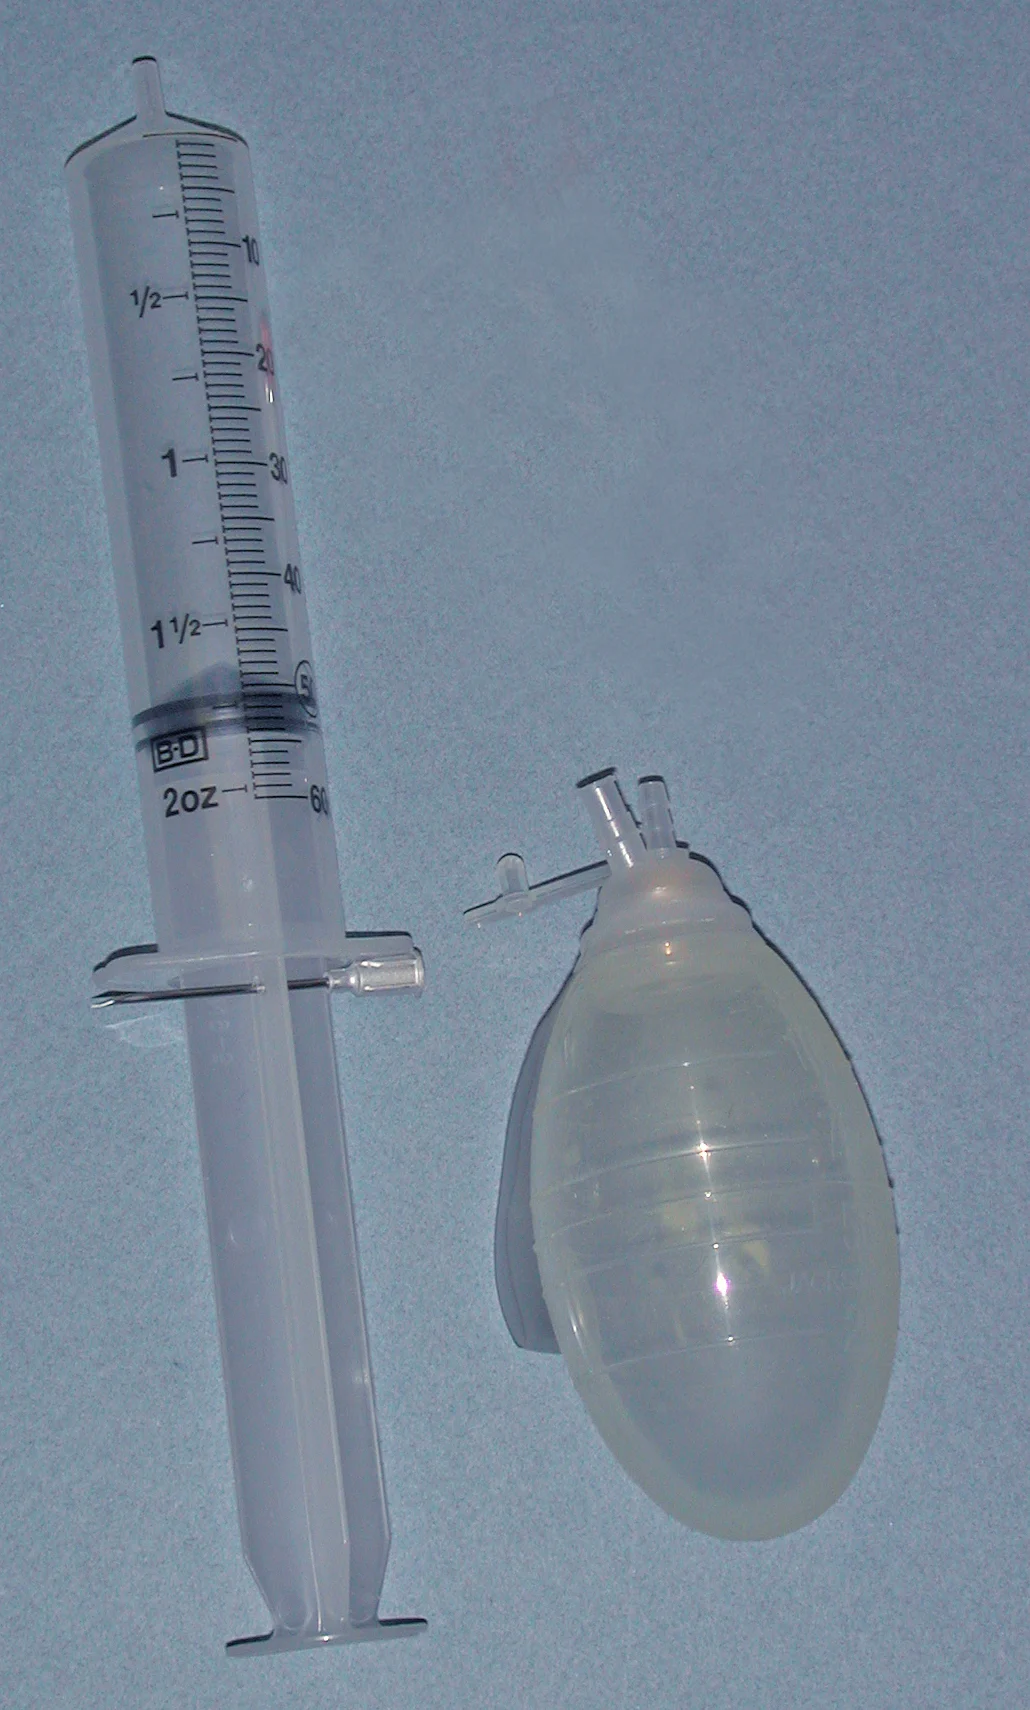
FIGURE 1 (A) Silicone tubing with multiple fenestrations on the left and a Jackson-Pratt catheter on the right. (B) Reservoir made from 60-cc syringe on the left and a Jackson-Pratt reservoir on the right.
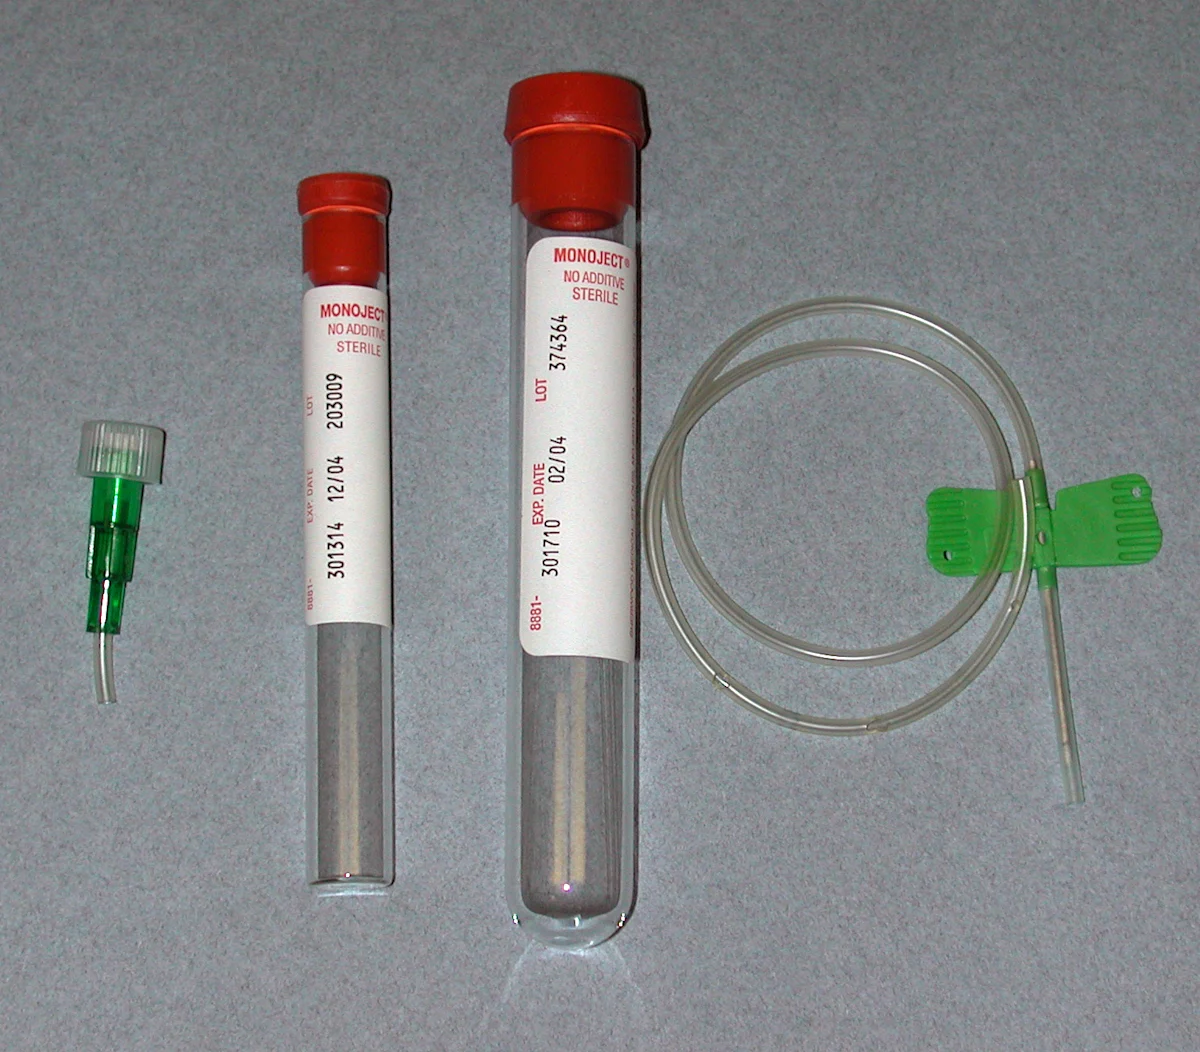
Active drains for small wounds can be constructed from butterfly catheters and blood collection tubes. Remove the Luer lock attachment from the catheter and cut holes with small scissors.
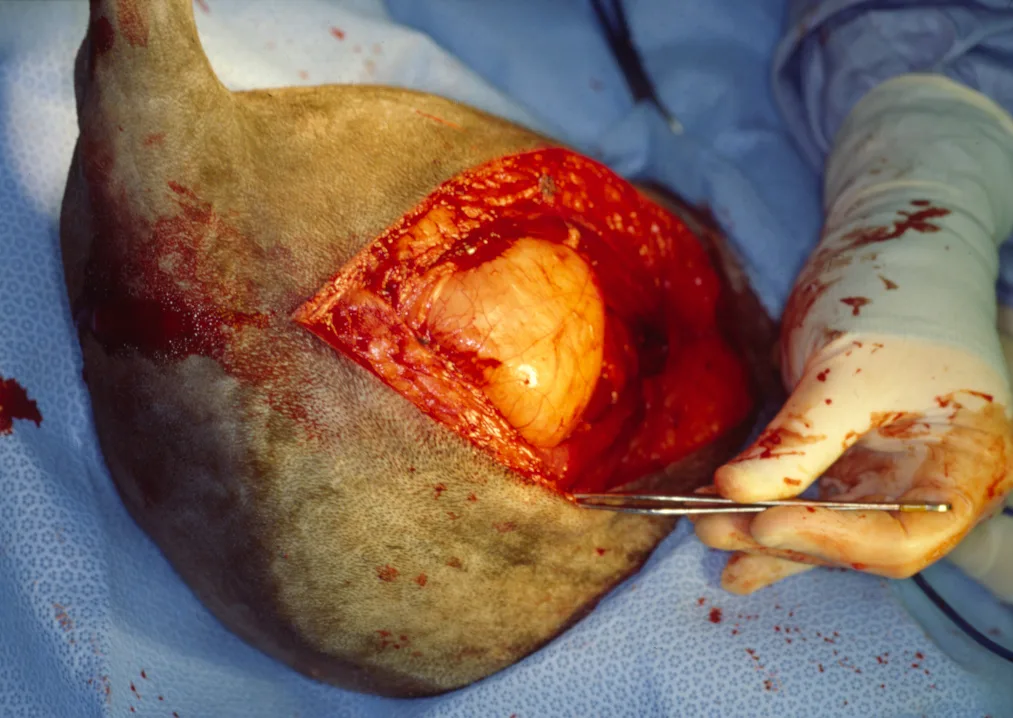
FIGURE 3A
Large intermuscular lipoma being excised from the thigh.
Management & Complications
Gently massaging the wound area may facilitate removal of fluid from wounds with passive drains. The skin around the exit site and the exposed end of passive drains should be kept clean by using an antiseptic solution. Obstruction should be suspected if drainage from active drains slows dramatically or stops completely. “Stripping” the drain may re-establish flow. Stripping is performed by first grasping the drain close to its exit site from the skin with one hand to stabilize it and minimize the risk for dislodgement. Next, the drain should be compressed with the thumb and index finger (or fingers) of the other hand close to the exit site; the thumb and forefinger should then be slid along the drain while maintaining compression to force any material in the drain toward the reservoir to empty the drain. This may have to be repeated multiple times if the drain is obstructed. Moistening the outside of the drain may facilitate the ability to slide along the drain while keeping it compressed. Bandaging wounds with drains helps protect the drain and provides a means of estimating the amount of fluid being removed by passive drains.
Potential complications include premature removal of the drain, obstruction, drain breakage, and infection.1,3 If the drain breaks, any portion remaining in the wound should be removed or it could serve as a nidus for infection. A retrospective study reported a 15.6% infection rate with active drains used in clean canine surgeries.4 The majority of infections occurred in patients that had axial pattern flap reconstructions. As indicated by the authors, it is difficult to determine whether the relatively high infection rate was associated with the surgical procedure, complications of the procedure (high rate of partial flap dehiscence), or other factors (eg, length of procedure) caused by the drain itself. Aseptic placement and meticulous postoperative management minimize the risk for drain-associated surgical site infection. Little information is available on the infection rate associated with use of passive drains, particularly in veterinary patients.
General Principles of Drain Placement
These principles apply regardless of whether a passive or active drain is placed.
The proximal end of drains placed in very superficial wound cavities (eg, subcutaneous pockets) can be secured with a suture placed through the skin, engaging the drain and then exiting back through the skin to minimize movement/migration of the drain within the wound. Although double exit sites are used with passive drains by some practitioners, there is no evidence that the second opening increases the efficiency of the drain, unless both openings create ventral drainage. For example, a passive drain placed in a wound on the dorsum of the back and exited laterally on both sides of the patient would establish ventral drainage from both openings.1 A second opening in high-motion areas (eg, axilla) may help reduce the risk for subcutaneous emphysema.
Exit the drain through a separate incision at least 1 cm from the primary suture line. Exiting drains through the primary incision line increases the risk for wound dehiscence.1
Secure the drain at the exit site. Sutures can be placed through passive drains, but a Chinese finger trap suture (or similar) should be used to secure active drains.
Avoid placing drains directly under the primary suture line.
Cover the surgical site and drain with a sterile bandage postoperatively.
Remove the drain when the wound exudate is serous or slightly serosanguinous and the volume is what might be expected for the type of wound being drained. Premature removal increases the risk for seroma formation; therefore, removal should be based on the condition of the wound being drained rather than the length of time the drain has been in place. The maximum amount of time a drain can be maintained has not been established. Maintaining active drains until fluid production is <0.2 mL/kg/hr has been suggested to reduce the risk for seroma formation.4 Quantifying the amount of drainage when passive drains are used would be difficult due to evaporative losses through the bandage.
Step-by-Step: Wound Drain Placement
What You Will Need
Sterile drapes and gloves
Surgery pack with needle drivers, Metzenbaum scissors, thumb forceps, hemostats, towel clamps, and scalpel handle with a #10 or #15 blade
3-0 or 4-0 monofilament absorbable suture for wound closure
3-0 or 4-0 monofilament nonabsorbable suture for skin closure and to secure drain
Passive or active drain system
Bandage materials—sterile primary dressing, cast padding, or other absorbent secondary dressing, elastic gauze, cohesive bandage material, and/or porous tape
Step 1
Select the most appropriate drainage system. (A) The Penrose drain (left) and the Jackson-Pratt drain system (right) are the most commonly used passive and active drains, respectively. (B) Placing an active drain in the pictured wound would be preferable, as it would likely be more effective in a wound of this size, depth, and location (ie, area of high mobility). Placement of a passive drain in a superficial wound is demonstrated, but the same steps apply to the placement of active drains.
A
Step 2
The proximal end of drains placed in subcutaneous wounds can be secured with a suture to facilitate maintaining optimal placement of the drain within the wound. The suture can be placed (A) blindly or, more accurately, by (B) first passing the needle under the skin and out through the incision. Next, pass the suture through the drain and then pass the needle back under the skin to exit close to the initial entry site. The drain will be pulled to the desired location when the suture is tightened. (C) Drains placed in deeper wounds do not need to be secured. Apposition of tissue layers during closure will maintain the drain’s position.

A
Step 3
Select the exit site. Exit passive drains from the most dependent area of the wound. Active drains can be exited wherever it is most convenient to secure the drainage reservoir. (A) Tent the skin with hemostats, then make a stab incision. (B) Spreading the tips and using them to tent the skin facilitates the incision process while protecting deeper tissues. Some active drainage systems come armed with a trocar that is used to exteriorize the drain through the skin.

A
Author Insight
Keep the incision as small as possible with active drains to minimize air leakage and loss of suction.
Step 4
Insert the hemostats through the incision to facilitate exteriorization of the drain.

Step 5
Secure the drain to the skin. (A) An interrupted suture through one side of the skin incision and the drain works well for passive drains. (B) Secure active drains with a Chinese finger trap suture or similar friction suture.

A
Author Insight
Securing active drains with a purse-string suture minimizes air leakage if the exit hole is too large. An ointment can be used to seal small leaks at the exit site or along the suture line.
Step 6
Change the bandage and/or empty the drainage reservoir as needed. Empty reservoirs when half-full or more to maintain adequate suction. Bandages covering passive drains should be changed if the wound fluid soaks through to the surface of the bandage.
Author Insight
Do not retrograde flush through the drain. If wound lavage is desired, place a separate ingress catheter, which should extend to the deepest part of the wound cavity. Ingress catheters are not often used with wound drains and should only be used for flushing into the wound.