Positioning Pelvic Limbs for Radiography
Jessica Davis, DVM Student, The Ohio State University
Stephen C. Jones, MVB, MS, DACVS (Orthopedics), DECVS, EBVS, Omega Veterinary Group, San Mateo, California
James Howard, DVM, MS, DACVS-SA, COVE Emergency Pet Care, Delaware, Ohio
Radiographic evaluation of pelvic limbs in dogs is a fundamental component of an orthopedic workup. Careful attention to patient positioning, acquisition technique, and image quality is essential to accurately assess the bones, joints, and soft tissues of the femur, stifle, tibia, tarsus, and digits. This article outlines practical techniques for patient positioning to obtain repeatable, high-quality diagnostic radiographs of the pelvic limbs.
Step-by-Step: Positioning a Pelvic Limb for a Lateral View of the Femur
What You Will Need
Small foam block (optional)
Step 1: Position the Patient
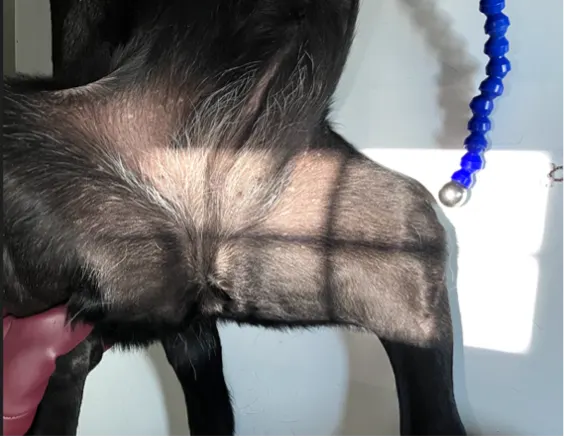
Place the patient in lateral recumbency with the affected limb on the table, the tibia and foot marginally elevated, and the tibia slightly medially rotated. Abduct the unaffected limb up and away from the table toward the patient’s back. Place a small foam block under the tarsus if needed to aid in positioning. Mildly flex the affected stifle joint, and position the femur as perpendicular to the vertebral column as possible.
Step 2: Position the Beam
Center the collimator beam over the femur so the laser alignment line runs parallel to the femoral diaphysis.

Author Insight
On the radiograph, the medial and lateral condyles should be almost perfectly superimposed (B). The patella (A) should be cranial, and the medial and lateral fabellae should have near superimposition to each other (arrow). In a straight lateral femoral view, the femoral head (C) should be slightly cranial and dorsal to the femoral diaphysis due to the femoral neck anteversion.


Step-by-Step: Positioning a Pelvic Limb for a Cranial Caudal View of the Femur
What You Will Need
V-trough sponge positioner
Tape (optional)
Step 1: Position the Patient
Place the patient in dorsal recumbency. Center the abdomen over a V-trough sponge positioner to keep the body straight; ensure the pelvis and caudal abdomen are outside of the trough. Pull the pelvic limb caudally into full hip extension, and manually hold (or tape down) the limb. Once the pelvic limb is completely extended, rotate the stifle slightly medially to align the femur. Center the patella within the patellar groove, facing toward the ceiling. Radiograph each femur individually.
Step 2: Position the Beam
Center the collimator beam over the femur so the laser alignment line runs parallel to the femoral diaphysis.

Author Insight
Hip pathology (eg, osteoarthritis) can limit hip extension and result in foreshortening of the femur. A horizontal-beam radiograph positioned perpendicular to the femoral diaphysis can be used in these situations.
With a straight craniocaudal femoral radiograph, the tip of the lesser trochanter should be visible on the medial side of the proximal femur (A); the medial (B) and lateral (D) fabellae should be equally positioned over the medial and lateral femoral cortices, but there can be some variation among patients. The patella (C) should be centered over the distal femur, and both sides of the intercondylar notch should be parallel and visible (parallel lines).


Step-by-Step: Positioning a Pelvic Limb for a Lateral View of the Tibia
What You Will Need
Gauze or foam pad (optional)
Step 1: Position the Patient
Place the patient in lateral recumbency with the affected limb on the table. Hold the limb or use positioning tools to keep the stifle and hock at a 90-degree angle. If needed, use gauze or a foam pad to elevate the tarsus and ensure the stifle joint does not rotate. Abduct the unaffected limb up and away from the table toward the patient’s back.
Author Insight
This positioning is ideal for planning some stifle surgeries (eg, tibial plateau-leveling osteotomy). For some procedures (eg, tibial tuberosity advancement), extending the stifle to a standing angle (≈135 degrees) is preferred.
Step 2: Position the Beam
Center the collimator beam over the tibia to include both the stifle and tarsal joint.

Author Insight
On the radiograph, the stifle and tarsus should be at an »90-degree angle. The patella should be cranial (white arrow), and the medial and lateral femoral condyles should be as superimposed as possible. The medial and lateral fabellae should have near superimposition to each other (black arrow).


Step-by-Step: Positioning a Pelvic Limb for a Cranial Caudal View of the Tibia
What You Will Need
V-trough sponge positioner
Tape (optional)
Step 1: Position the Patient
Place the patient in dorsal recumbency (or for caudocranial projection, position the patient in sternal recumbency). Center the abdomen over a V-trough sponge positioner to keep the body straight; ensure the pelvis and caudal abdomen are outside of the trough. Retract the pelvic limb caudally, pulling the hips and stifles into full extension; manually hold (or tape) the limb in position. Once the pelvic limb is completely extended, rotate the stifles slightly medially to align the stifle joints. Center the patella within the patellar groove, facing toward the ceiling.
Step 2: Position the Beam
Center the collimator beam over the tibia to include the stifle and tarsal joints. Ensure the beam is extended laterally to just outside the margins of the skin.

Author Insight
On the radiograph, the medial (A) and lateral (C) fabellae should be bisected by the medial and lateral femoral cortices (lines). The patella (B) should be centered in the patellar groove. The medial edge of the calcaneus (arrow) should bisect the distal intermediate ridge of the tibia (center of the curved line), ensuring a straight tarsus and distal tibia. If the stifle and tarsus (circles) are straight, the tibia and fibula will be straight. In the rare case of an angular or torsional deformity, achieving a straight view of the stifle and tarsus in 1 view may be challenging; straight views of the stifle and tarsus should thus be acquired individually.


Step-by-Step: Positioning a Pelvic Limb for a Lateral View of the Tarsus & Metatarsus
What You Will Need
Gauze or thin foam sponge (optional)
Tape (optional)
Step 1: Position the Patient
Place the patient in lateral recumbency with the affected limb on the table. Manually hold (or tape) the limb in position. If needed, place a thin foam sponge or gauze under the calcaneus to help straighten the tarsus. Abduct the unaffected limb up and away from the patient’s body.
Step 2: Position the Beam
Center the collimator beam over the talus, which is distal to the medial malleolus and can be identified with palpation. Ensure the beam includes the distal third of the tibia, the fibula, and all metatarsal bones.

Author Insight
The trochlear ridges of the talus should be superimposed (gray arrow), and the calcaneus (dashed arrow) should not be foreshortened. The proximal (A) and distal (B) row of tarsal bones should align with clear superimposition, with visible joint space between the 2 rows of bones (white arrow). Perfect superimposition of the metatarsal bones (bracket) cannot occur because of the procurvatum of the foot. The dewclaw (if present) will lie caudally.


Step-by-Step: Positioning a Pelvic Limb for a Dorsal/Plantar View of the Tarsus & Metatarsus
What You Will Need
V-trough sponge positioner
Step 1: Position the Patient
Place the patient in dorsal recumbency. Center the abdomen over a V-trough sponge positioner to keep the body straight; ensure the pelvis and caudal abdomen are outside of the trough. Position the pelvic limb with the hip, stifle, and tarsal joints fully extended. Rotate the stifle joint medially to help align the tibia and tarsus.
Step 2: Position the Beam
Center the collimator beam over the talus, which is immediately distal to the medial malleolus of the tibia and can be identified with palpation. Do not center the beam on the calcaneus, as this would point the beam proximal to the joint, which is not ideal for radiographic evaluation of the tarsus. Ensure the distal third of the tibia, fibula, and all metatarsal bones are included.

Author Insight
On the radiograph, the tarsal joint should be relaxed and not flexed, with visible space between the tarsal joints (white arrows). All metatarsal bones should be parallel to each other (gray arrows).The medial edge (dashed arrow) of the calcaneus (A) should bisect the distal intermediate ridge of the tibia (B), ensuring the tarsus and distal tibia are straight.


Step-by-Step: Positioning a Pelvic Limb for a Lateral View of the Digits
What You Will Need
Gauze or foam pad
Radiographic marker
Wooden spoon (optional)
Tape (optional)
Step 1: Position the Patient
Place the patient in lateral recumbency with the affected limb on the table. Place a small object (eg, foam pad, gauze) under the calcaneus to keep the limb level and prevent overrotation of the limb and digits. Manually separate and tape down the digits (or use a wooden spoon to press, spread, and tape down the digits) to prevent to prevent superimposition on the radiograph—all digits should be visibly exposed and not overlap. Use a radiographic marker (eg, spherical ball marker, radiopaque numbered marker) to identify the different digits.
Step 2: Position the Beam
Center the collimator beam over the tarsometatarsal joints to include the distal metatarsals and all digits (the tarsus can also be included).

Author Insight
In these examples, the spherical marker ball was placed adjacent to digit V. Radiopaque numbered markers can also be used to individually identify each digit (not shown here). All digits should be separate and identifiable (arrows). The phalanges of each digit should be visible down through the toenail.


Step-by-Step: Positioning a Pelvic Limb for a Dorsal/Palmar View of the Digits
What You Will Need
V-trough sponge positioner
Wooden spoon (optional)
Tape
Gauze
Step 1: Position the Patient
Place the patient in dorsal recumbency. Center the abdomen over a V-trough sponge positioner to keep the body straight; ensure the pelvis and caudal abdomen are outside of the trough. Make sure both pelvic limbs are completely extended and the unaffected limb is not in the imaging view.
Author Insight
To evaluate the entire bony structures, the digits may need to be separated manually (using either a wooden spoon to press down and spread the digits or using gauze without woven radiopaque detectors) and taped down.
Step 2: Position the Beam
Center the collimator beam over the tarsometatarsal joints to include the distal metatarsals and all digits (the tarsus can also be included).

Author Insight
All digits should be separated and clearly visible. The bony edges of the metacarpal bones should be parallel to each other (arrows), and all phalanges (P1 [A], P2 [B], P3 and nail [C]) should be included.

