Fine-Needle Biopsy for Cytology
Katie M. Boes, DVM, MS, DACVP, Virginia–Maryland College of Veterinary Medicine
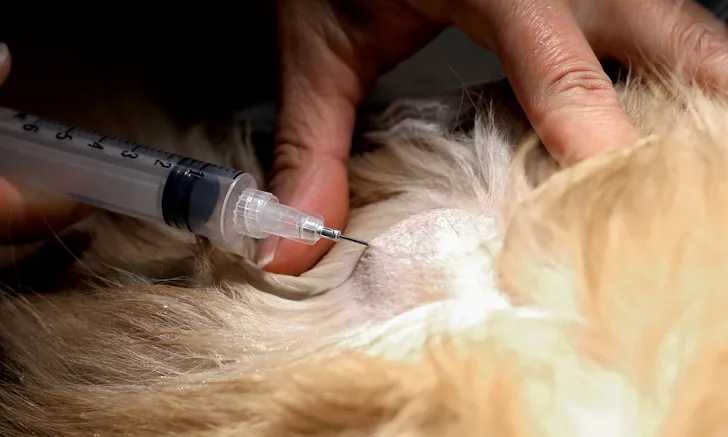
Fine-needle biopsy is used to sample diseased tissue for microscopic evaluation of cells (ie, cytology), which may be helpful in the initial or definitive diagnosis of infection, neoplasia, or other clinical states. Fine-needle biopsy may be performed with a needle attached to a syringe (ie, fine-needle aspiration) or with only a needle (ie, fine-needle capillary sampling). Fine-needle aspiration is preferred for sampling tissue with normal or low blood vascularity as well as tissue containing fibrous stroma. However, fine-needle capillary sampling may be used to reduce blood contamination when the lesion is suspected to be highly vascularized (eg, thyroid gland, hemangiosarcoma) or when the aspiration pressure results in ruptured cells (eg, cells of the thyroid gland and some lymphomas).
This discussion will focus on fine-needle biopsy of solid peripheral tissues, such as peripheral lymph nodes and solid skin lesions. Sampling internal tissues may require confirmation of adequate hemostasis (eg, adequate platelet concentration, normal coagulation testing), patient sedation, ultrasonographic guidance, and longer biopsy needles. Aspiration of fluid-filled lesions will require collection of the fluid into a tube containing EDTA (purple top) for optimal cytologic evaluation and/or into a tube without anticoagulant (red top) for culture or chemistry testing. Of note, the author recommends aspiration into EDTA only for aspiration of fluid (eg, cysts, vitreous samples) but not for samples suspected to be of low volume.
Some of the most common sample preparation pitfalls include:
Applying too much vacuum pressure when performing fine-needle aspiration, thereby lysing cells
Applying too much pressure when making compression preparations, thereby lysing cells
Applying too little pressure when making compression preparations of thicker preparations
Sampling nondiagnostic areas of the lesion, such as necrotic centers or superficial ulcers
Quick stains can be used to evaluate slides with an in-house microscope, but most clinical pathologists prefer evaluating cytology samples with the reference laboratory’s stain. If the samples are collected for evaluation by a pathologist, allow at least one slide to remain unstained.
Step-by-Step: Fine-Needle Aspiration
The goal of fine-needle aspiration is to obtain representative cells from the primary lesion. This will require redirecting the needle in the tissue of interest while avoiding nondiagnostic areas (eg, necrotic centers of large masses) and areas with secondary inflammation or infection (eg, superficial ulcers).
What You Will Need
Gloves
Gauze or cotton balls soaked in 70% isopropyl alcohol
Syringes (6-12 mL)
Needles (1-1.5 inches; 20-22 gauge)
Sterile 4% disodium EDTA
2 to 10 clean glass microscope slides
Flat, firm surface
Hair dryer (optional)
Writing utensil (eg, pencil, slide marker)
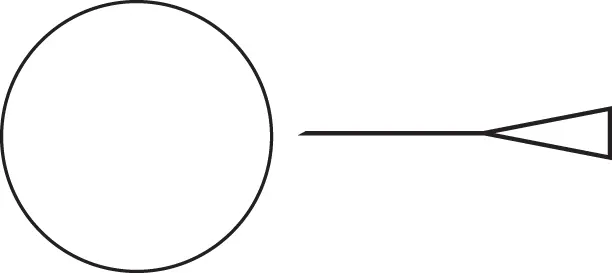
Step 1
Prepare the supplies and aspiration site. Lay 2 to 10 clean glass slides on a solid surface. Attach the needle to the syringe, then coat the needle and syringe hub with sterile 4% disodium EDTA. Clean the sample area with alcohol.
Step 2
Stabilize the tissue of interest with one hand. With the other hand, insert the needle tip (bevel side up) into the tissue, then retract and release the syringe plunger. The amount of negative pressure may vary depending on the consistency of the tissue; softer tissues may require less pressure, whereas firmer tissues may require three-fourths of the syringe volume. To avoid sample hemodilution, apply negative pressure for no more than a few seconds in any given area.
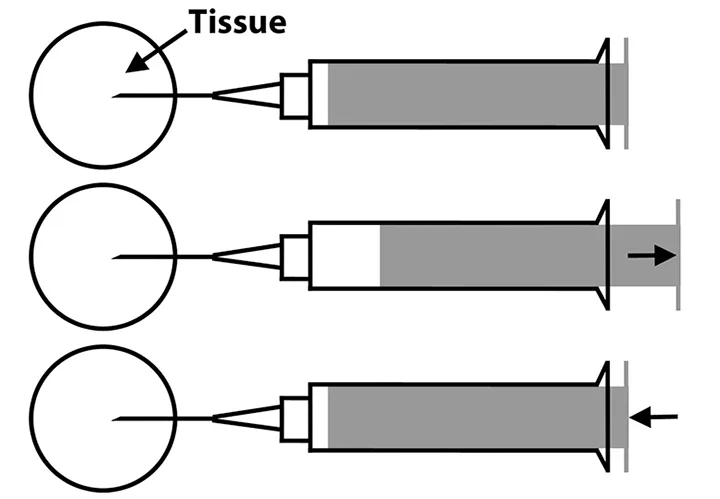
Step 3
Without completely removing the needle from the tissue of interest, retract and redirect the needle tip into a different area. Retract and release the syringe plunger as described in Step 2. Repeat as many as 4 times, depending on lesion size.
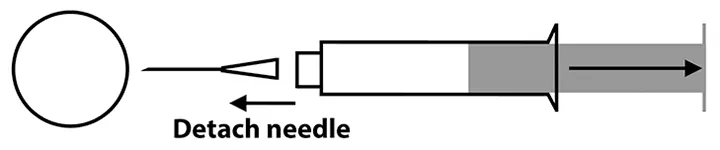
Step 4
Completely remove the needle from the tissue. The sampled tissue should be within the needle shaft and hub. Detach the needle from the syringe, then retract the plunger to fill the syringe with air.
Step 5
Reattach the needle to the syringe. Direct the needle tip (bevel side down) onto the surface of a glass slide, and force a small amount of the aspirated tissue onto the glass surface ≈0.5 inches from the frosted edge by quickly and firmly compressing the plunger. Repeat with additional glass slides as necessary.
Step 6
Prepare compression (squash) preparations (see Step-by-Step: Compression [Squash] Preparations) before the sample begins to dry.
Step-by-Step: Fine-Needle Capillary Sampling
Step 1
Prepare the supplies and aspiration site. Lay 2 to 10 clean glass slides on a solid surface. Attach the needle and syringe, and coat the needle and syringe hub with sterile 4% disodium EDTA, then remove the needle from the syringe. Clean the sample area with alcohol.
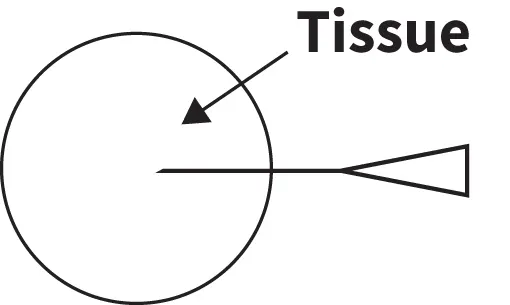
Step 2
Stabilize the tissue of interest with one hand. With the other hand, insert the needle tip (bevel side up) into the tissue of interest.
Step 3
Without completely removing the needle from the tissue of interest, retract and redirect the needle tip into a different area. Repeat as many as 4 times, depending on lesion size.
Step 4
Completely remove the needle from the tissue. The sampled tissue should be within the needle shaft and hub.
Step 5
Retract the syringe plunger to fill the syringe with air, then attach the needle and syringe. Direct the needle tip (bevel side down) onto the surface of a glass slide, and force a small amount of the aspirated tissue onto the glass surface ≈0.5 inches from the frosted edge by quickly and firmly compressing the plunger. Repeat with additional glass slides as necessary.
Author Insight
Correct placement of the aspirated material onto the glass surface helps ensure the sample is centrally placed on the slide during the compression preparation. If not correctly centered, the sample may fall off the edge of the slide during preparation or remain unstained when processed by automatic stainers.
Step 6
Prepare compression (squash) preparations (see Step-by-Step: Compression [Squash] Preparations) before the sample begins to dry.
Step-by-Step: Compression (Squash) Preparations
The goal of compression preparations is to disperse the cells in the sample into a monolayer without lysing the cells.
Author Insight
Dust and microscopic glass fragments can lyse cells during compression preparation. Ensure the slides are clean before preparation by wiping them with a dry wipe or bioabsorbent pad.
Step 1
Using the thumb and forefinger, firmly grasp the frosted edge of the slide with the sample facing upward. Using the opposite hand, hold a second clean glass slide above the sample.
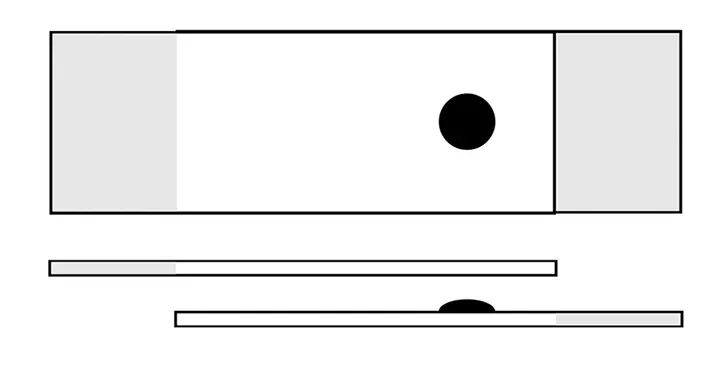
Step 2
Gently lower the top glass slide onto the slide with the sample, allowing the weight of the top glass slide to disperse the sample. If the sample is excessively thick and does not allow the top slide to lay flat, apply gentle compression until the sample disperses.
Step 3
Pull the top and bottom slides apart in opposite directions while keeping the surfaces of the slides in contact and parallel. Most samples can be spread with just the weight of the slides. Thicker preparations may require gentle compression while the slides are pulled apart.
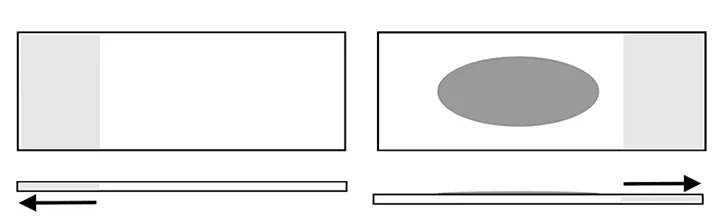
Step 4
Allow the slides to air dry, or use a hair dryer on a cool setting to speed the drying process. Label the slides with patient and tissue identifying information.