Top 5 Tips for Diagnostic Blood Collection
Blood collection skills are essential for a veterinary technician to aid in the proper diagnosis and monitoring of a patients progress.
Collection does not start and end with venipuncture and aspiration of blood into syringes; blood samples must be taken safely and with proper integrity, all while providing the highest quality of care.
1. Plan Carefully & Choose the Proper Tools
Successful blood sampling is ensured with preparation and planning regarding the volume, site, method, and collection order. A smaller gauge needle is required for fragile and small veins; larger gauge needles provide the best flow for rapid, high-volume sampling, if vessel size allows.1 Sampling volume dictates syringe size. Larger syringes need gentle care of the plunger to control negative pressure and prevent vessel collapse. Butterfly catheters allow swapping in smaller syringes as needed to prevent veins collapsing and provide better patient comfort, while requiring more maneuverability.
2. Consider Site Selection
Venipuncture site selection is based on patient temperament, vessel accessibility and size (compared with volume required), and the patients presenting complaint. The jugular vein is preferred, unless the patient experiences restraint-induced stress, or has skin folds or an excessive coat. The lateral or medial saphenous and cephalic veins are more favorable if the patients coagulation status is unknown or if the patient has head trauma, respiratory compromise, and wounds or skin infections on the neck. Peripheral vessels are less favorable for large volume collections or in patients with painful limbs (eg, arthritis patients). Pedal veins are often more accessible in breeds with thick, excessive skin folds.
3. Understand Specific Sample Requirements
Various sample tubes are required for specific diagnostic testing, and a proper order of draw should be planned in advance to prevent erroneous results from tube-additive contamination.2 Blood culture samples that require a strict aseptic technique, as well as coagulation profiles that require clean, direct venipuncture are examples of test- specific requirements.
Minimize patient stress and maximize chances of success by collecting blood samples in a low-traffic area where all the necessary supplies are within easy reach. If the collection requires multiple syringes, another team member should help with patient restraint and tube filling. If help is not available, additional tube handling can be minimized by standing the open tubes upright in a tube rack or in the core of a roll of tape. A vacuum collection needle set can eliminate syringe use, but the ability to control the negative pressure is lost.
Before venipuncture, ensure that all team members involved know the submission requirements and the plan of draw.
4. Perform the Draw Using Specific Techniques
All team members performing a blood draw must wear gloves or have clean hands. The below step-by-step guide outlines proper blood collection technique:
Determine the vessel location through palpation and/or visualization. If necessary, shave the coat.
Treat the site aseptically, typically with alcohol.
Insert the needle gently yet decisively through the skin to trigger less patient reaction.
Tip 1: Place adequate tension on the skin and surrounding tissues with help from a team member to restrain the patient and from a phlebotomist to keep the vessel from rolling away from the needle.
Tip 2: Avoid applying excessive tension to keep hypovolemic or narrow veins from collapsing or stretching.
Tip 3: When skin is tough or dehydrated, insert the needle into the side of the vein and redirect it to prevent accidental vein piercing as the vein springs back with the skin upon breach.
Aspirate the blood with steady negative pressure and needle positioning to prevent fluttering of the vessel wall against the needle opening, which can lead to hemolysis, patient discomfort, and clotting.
Fill and gently invert the tubes several times. Label the tubes either prior to the draw or immediately after filling to minimize the chances of sample mix-up or misplacement.
After the needle is withdrawn, apply pressure to the venipuncture site to promote hemostasis.
Follow the processing and storage requirements for each specific test.
5. Minimize Stress & Harm
Blood samples can be collected from peripheral IV or sampling catheters to eliminate additional patient pain and anxiety from venipuncture. However, IV-catheter aspiration increases the chance of hemolysis, especially when narrower catheters or vacuum sets are used,3 and may produce inaccurate blood glucose and electrolyte measurements once the catheter is already flushed.4-6
Sampling catheters are inserted into central vessels and can be used for serial blood sampling without adding discomfort, but a pre-sample aspiration of 3 to 6 times the catheters priming volume is required for accurate results. The collection volume is minimized in serial collections to prevent iatrogenic anemia, especially in smaller or anemic patients. In some patients, pricking superficial vessels (eg, in the ears or paw pads) to collect blood drops for testing (eg, blood glucose) may be more agreeable. Liposomal lidocaine cream safely provides transdermal analgesia when painful reactions are expected.7

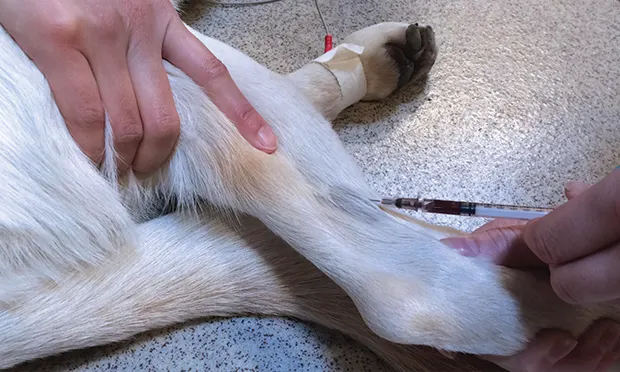
Figure 1
L**ateral Saphenous Blood Sampling**
Blood samples are commonly drawn from the lateral saphenous vein in dogs.
Conclusion
Blood collection may seem simple, but the veterinary technician must plan carefully, pay attention to detail, be accurate and reliable, and cause the patient minimal stress and harm to uphold good standards of care.