Robert Jones Bandage
Stanley E. Kim, MS, DACVS, University of Florida
Application of a traditional Robert Jones bandage can simply provide transient support of injuries distal to the elbow and stifle in dogs and cats. This bandage is commonly used for initial treatment of antebrachial and crural fractures and for fractures, instability, and luxations of the distal extremities.
When the bandage is applied correctly, compression is evenly distributed to underlying tissues. The compression and the bulk of the bandage address pain by providing early stability to the traumatized area.1,2 This bandage is also beneficial for minimizing or preventing local tissue edema and hemorrhage.1,2 The bandage should be maintained until definitive repair can be performed.
Although closed reduction of fractures is not necessary before application of the Robert Jones bandage, limb alignment should be as close to normal as possible.
Step-by-Step: Robert Jones Bandage
What You Will Need
White adhesive tape (1-inch wide)
Tongue depressor
12-inch roll of cotton (for medium to large dogs) or 3–4 rolls of 2- to 4-inch cast padding (for cats and small dogs)
2–3 rolls of 3- to 6-inch roll gauze
1–2 rolls of self-adherent elasticized wrap
Bandage scissors
2-inch adherent elastic tape (optional)
Clean disposable surgical gown sleeve (optional)

Anesthetic Considerations
Sedation or general anesthesia may be required. Pure mu-agonist opioids such as hydromorphone (0.05–0.2 mg/kg IM, IV, or SC) or methadone (0.1–0.5 mg/kg IM, IV, or SC) are preferred analgesics that also have some sedative properties. An opportune time to apply a Robert Jones bandage is after radiography, which also frequently requires chemical restraint.
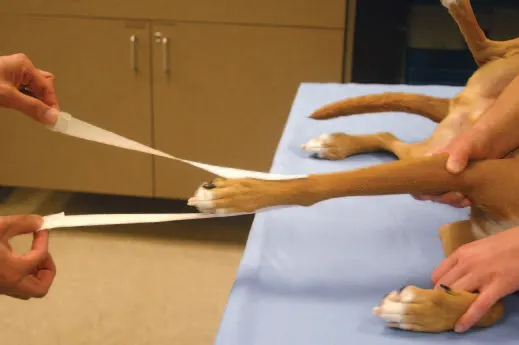
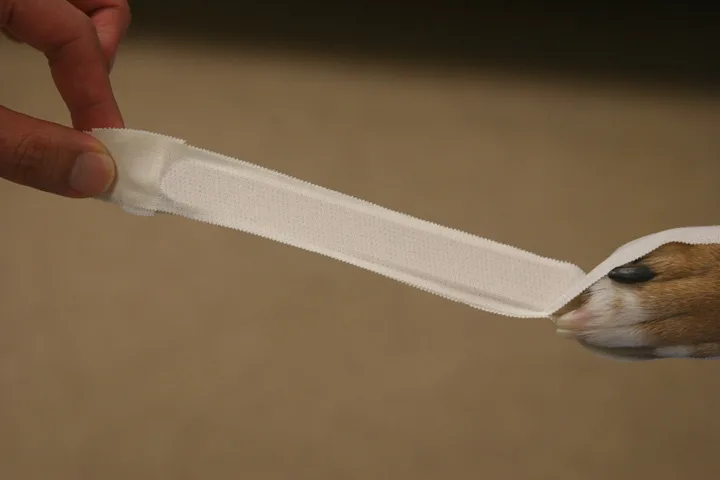
Step 1
Place the patient in lateral recumbency with the affected side facing up. Dress any wounds that will be covered by the bandage with an appropriate contact layer. Apply strips of white adhesive tape as stirrups to the medial and lateral surfaces of the limb, extending from the carpus or tarsus to 4–6 inches beyond the digits (A). Fold the ends of the stirrups to create tabs, and place a tongue depressor between the strips of tape (B).
Step 2
Unravel the roll of cotton and remove the paper. Because the 12-inch roll of cotton is too wide for effective application in all except the largest canine breeds, it should be torn longitudinally in half or thirds to create narrower strips of padding. Afterward, evenly reroll the cotton.

Step 3
Apply the roll of cotton (or cast padding for cats and smaller dogs) with the limb in full extension. Application always starts at the level of the digits; only the nails of digits 3 and 4 should be visible when the bandage is started and finished (A). Orient the cotton roll so the uter layer of cotton unrolls onto the limb.
Apply the cotton distally to proximally up the limb, using firm even pressure. Layers should overlap by 50%; avoid folding or wrinkling to prevent uneven distribution. Extend the padding to the level of the mid-humerus or midfemur (B). The cotton will tear if the pressure is too great.
Author Insight
With each successive layer, monitor the position of the toes, as the distal limb can become rotated and cause excessive supination or pronation. If this is observed, apply the next layer in the opposite direction to reorient the distal limb appropriately (eg, from distolaterally to cranially to proximomedially if the paw appears supinated).


Step 4
Use the roll gauze to secure and compress the cotton layer. As previously explained, application starts distally and progresses proximally by overlapping the gauze by 50% on each successive turn. To achieve adequate compression, pull the roll gauze tightly against the countertraction being applied to the limb by the supporting hand during both the cranial (A) and caudal (B) passes. This should compress the cotton layer by ~50%. Apply 2–3 layers of roll gauze.
The roll gauze should capture the entire length of the cotton, including the proximal and distal margins; however, the gauze should not contact the skin (C). Make sure the roll gauze does not become bunched or twisted and cause a line of compression.
Author Insight
Overtightening the bandage can be difficult in medium to large dogs; rather, undertightening and subsequent slippage are more common.


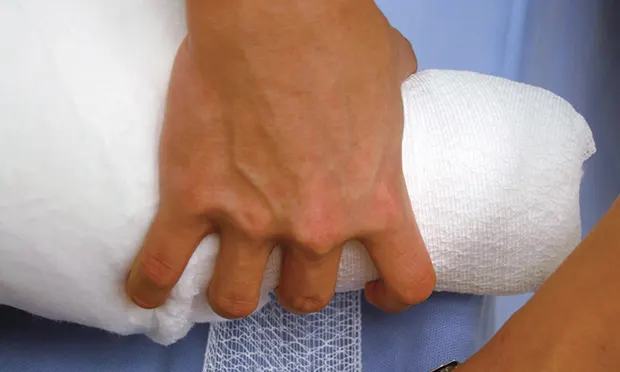
Step 5
Separate the white tape strips at the tabs and remove them from the tongue depressor (A); twist the tape strips and apply them to the respective surfaces of the roll gauze layer (B).


Step 6
Apply the self-adherent elasticized wrap from distal to proximal, with 50% overlap of the layers (A). Unraveling and rerolling the wrap to avoid overtightening the bandage is unnecessary. Fine-tune the degree of compression before finishing the final layer, but always apply each layer firmly and evenly.
The outer layer should capture the gauze and cotton layers but not contact the skin proximally. This layer should be taut over the entire bandage (B).
Check the bandage every few hours for slippage or loosening. The cotton layer can stretch with motion; the bandage is too loose if a gap between the proximal aspect of the bandage and the skin is visible.
Author Insight
Pinging the bandage with a finger should result in a sound similar to tapping a ripe watermelon. As a precaution, monitor the patient’s toes for swelling, which can occur (although rarely) if the bandage is too tight.


Step 7
Optional: Apply adherent elastic tape distally as a durable layer in areas where the bandage may rub against the floor during weight-bearing (A). A sleeve from a disposable surgical gown can be used as a water-resistant barrier to protect the bandage from becoming wet or soiled (B).
Author Insight
Although reinforcement of the Robert Jones bandage with metal or plastic materials has been described, the author does not find this necessary as long as adequate bulk and compression are achieved.

