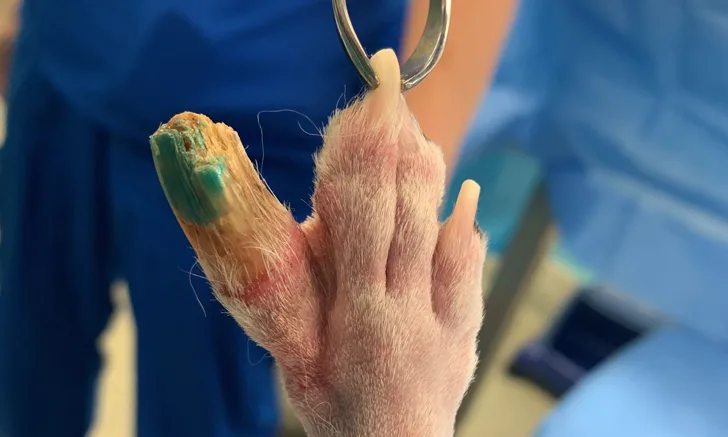
Digit amputation is indicated in dogs with digital or subungual neoplasms, degloving/shearing wounds of the foot, chronic sprains or luxations, phalangeal or intra-articular fractures, chronic osteomyelitis, severe osteoarthritis, or chronic severe dermal diseases (eg, chronic severe acral lick dermatitis), as well as in dogs requiring distal foot skin reconstruction via phalangeal fillet techniques.1
Joints
Amputation is generally performed at the metacarpophalangeal or metatarsophalangeal joints, especially in patients with neoplasms or osteomyelitis. More distal amputations are reserved for patients with traumatic or degenerative diseases that only affect the distal phalanges. Amputation of the second or fifth digit does not affect limb function; however, amputation of the third or fourth digits, which are weight-bearing, may affect function or result in mechanical lameness.2
The surgical principles of proximal and distal interphalangeal joint amputation and metacarpophalangeal and metatarsophalangeal joint amputation are similar.1,2 The digital pad is preserved in proximal and distal interphalangeal joint amputation but is removed in metacarpophalangeal and metatarsophalangeal joint amputation, most frequently performed for digit amputation.1,2 If the location is distal (second or third phalanx) and the condition is benign, amputation at the interphalangeal joints can be performed.
Lesions
Malignant lesions usually require soft tissue and bone margins (wide surgical excision) for cancer-free excision at the surgical margin. Distal malignant lesions are thus usually excised at the metacarpophalangeal or metatarsophalangeal joints. Ring block or regional analgesia can be performed using longer-lasting anesthetics (eg, bupivacaine, liposome-encapsulated bupivacaine).
Step-by-Step: Digit Amputation
What You Will Need
#15 scalpel blade
Rongeur
Electrocautery tool (recommended)
Metzenbaum scissors
Monofilament nonabsorbable suture (4-0 or 3-0)
Monofilament absorbable suture (4-0 or 3-0)
Needle holder
Bandage materials
Esmarch tourniquet
Adherent wrap
Scissors
Metacarpophalangeal & Metatarsophalangeal Joint Amputation
Step 1
To exsanguinate the limb, tightly apply an Esmarch bandage from the most distal aspect of the toes to 2 to 3 cm proximal to the carpus or the tarsus. Tightly secure the bandage at the proximal aspect of the limb to prevent blood from flowing into the limb during surgery. Cut the bandage from distal to proximal to expose the surgical site (up to the carpus or tarsus), leaving the most proximal aspect of the tourniquet intact. Be careful not to cut the skin.
Author Insight
Applying an Esmarch bandage prevents the limb from bleeding and removes blood from the limb. There are many advantages of a bloodless surgery, but it may be difficult to identify when large vessels are punctured, and ligation may be required. In addition, use of an Esmarch bandage can result in regional ischemia; the surgeon should work quickly and be conscious of surgical time to minimize ischemic morbidity of the distal aspect of the extremity. A tourniquet should not be used longer than 1 to 2 hours and should be removed as soon as possible.3
Step 2
Beginning on the dorsal aspect of the affected digit, make an inverted Y-shaped skin incision along the sides of the digit that meets on the palmar aspect.4


Author Insight
This incision results in a straight line after suturing and allows removal of the digital pad. If the digit is removed because of a neoplastic condition, the incision shape may require modification to incorporate the skin margin necessary for wide surgical excision.
Step 3
Ligate or cauterize arteries and veins that are <1 to 2 mm in diameter and located axially or abaxially at the dorsal (dorsal common digital vasculature) and ventral (palmar common digital vasculature) aspects of the digit.5
Step 4
Transect the tendons of the superficial and deep digital flexor (palmar), as well as the common digital extensor (dorsal, thoracic limb) or long digital extension (dorsal, pelvic limb) at the level of the proximal phalanx and the metacarpal (or metatarsal) bone.5

Step 5
Carefully transect the joint capsule at the level of the phalanx and the corresponding metacarpal (or metatarsal) bone to be amputated. Avoid direct mechanical damage to the cartilage,5 and remove the digit. Perform a condylectomy if needed to allow cosmetic closure of the skin.

Author Insight
There is controversy in human and veterinary medicine on whether condylectomy increases pain. Condylectomy causes a disturbance of the joint cartilage and subchondral bone, which remains exposed to deeper tissue, potentially increasing pain.6 The third and fourth metacarpal and metatarsal bones may require condylectomy, and the second and fifth metacarpal bones may be beveled on the medial and lateral aspect, respectively.
Step 6
Remove the tourniquet.

Author Insight
Hemostasis with cautery or ligations is often necessary before closure. The tourniquet can be removed at the end of the procedure, immediately before adding a soft, padded bandage. The authors remove the tourniquet prior to tissue closure to visualize excessive bleeding and ensure hemostasis prior to suturing. Removing the tourniquet prior to closure also minimizes how long the tourniquet is applying active pressure, decreasing tourniquet-associated morbidity.
Step 7
Suture subcutaneous tissue with a simple interrupted pattern using a 3-0 or 4-0 monofilament absorbable suture (A). Suture the skin with a cruciate pattern using a 3-0 or 4-0 monofilament nonabsorbable suture (B).


Step 8
Provide postoperative multimodal pain management with injectable analgesics (ie, mu agonist opioids) for the first 12 to 24 hours and oral analgesics (eg, NSAIDs, gabapentin, tramadol) after the patient recovers and has normal deglutition.
Step 9
Use a soft, padded bandage for 1 to 2 weeks (if tolerated by the patient) to prevent trauma to the incision while walking. Restrict exercise for 3 weeks until the wound heals.
Proximal & Distal Interphalangeal Joint Amputation
Step 1
To exsanguinate the regional distal area of the limb, tightly apply an Esmarch bandage from the most distal aspect of the toes to 2 to 3 cm proximal to the carpus or the tarsus. Tightly secure the bandage at the proximal aspect of the limb to prevent blood from flowing into the limb during surgery. Cut the bandage from distal to proximal to expose the surgical site (up to the carpus or tarsus), leaving the most proximal aspect of the tourniquet intact. Be careful not to cut the skin.
Author Insight
Applying an Esmarch bandage prevents the limb from bleeding and removes blood from the limb. There are many advantages of a bloodless surgery, but it may be difficult to identify when large vessels are punctured, and ligation may be required. In addition, use of an Esmarch bandage can result in regional ischemia; the surgeon should work quickly and be conscious of surgical time to minimize ischemic morbidity of the distal aspect of the extremity. A tourniquet should not be used longer than 1 to 2 hours and should be removed as soon as possible.3
Step 2
Make a skin incision that encircles the nail (around the ungual process), sparing the digital pad. Continue the incision proximally and dorsally (over the phalangeal bone) to expose the distal interphalangeal joint or the proximal interphalangeal joint depending on the determined level of amputation.
Step 3
Sharply dissect soft tissue away from the bone and transect the extensor tendons (dorsal), flexor tendons (palmar), and collateral ligaments (lateral).
Step 4
Disarticulate the joint.
Author Insight
There is controversy in human and veterinary medicine on whether condylectomy increases pain. Condylectomy causes a disturbance of the joint cartilage and subchondral bone, which remains exposed to deeper tissue, potentially increasing pain.6 The third and fourth metacarpal and metatarsal bones may require condylectomy, and the second and fifth metacarpal bones may be beveled on the medial and lateral aspect, respectively.
Step 5
Suture the subcutaneous tissue with an appositional, interrupted knot-burying pattern to maximize wound healing and prevent wound dehiscence in a high-motion area. Create a Y-shaped pattern by pulling the digital pad over the cut end of the bone and suturing (both sides) laterally and dorsally.
Step 6
Suture the skin with a simple interrupted pattern using a 3-0 or 4-0 monofilament nonabsorbable suture, which can typically be removed 2 to 3 weeks postoperatively.
Step 7
Provide postoperative multimodal pain management with injectable analgesics (ie, mu agonist opioids) for the first 12 to 24 hours and oral analgesics (eg, NSAIDs, gabapentin, tramadol) after the patient recovers and has normal deglutition.
Step 8
Use a soft, padded bandage for 1 to 2 weeks (if tolerated by the patient) to prevent trauma to the incision when the patient walks. Restrict exercise for 3 weeks until the wound heals.
Author Insight
The authors recommend applying a compressive bandage for the first week (if tolerated and no bandage morbidity occurs). Although motion at the surgical site is unavoidable, some surgeons prefer to apply a stiffer bandage by adding a palmar/plantar-located splint for one week to help minimize movement of the digits. Use of a splint should be weighed against the risk for morbidity due to increasing pressure points on a wound area.