Skin Scraping for External Parasites
Douglas J. DeBoer, DVM, DACVD, University of Wisconsin–Madison
Diagnostic evaluation of a patient with skin disease always starts with the dermatologic essential baseline—namely skin scrapings, skin cytology, and ear cytology. Identifying parasitic and infectious causes of skin and ear disease is the first priority, as these conditions are common. After careful examination for fleas via combing, the next step is to evaluate for microscopic ectoparasites, typically found with 1 or more skin-scraping methods.
Step-by-Step: Skin Scraping Methods
What You Will Need
Pictured
Mineral oil in dropper bottle
Dull #10 scalpel blade or stainless steel microspatula
Microscope slides and cover slips
Clear (ie, not frosted) cellophane (acetate) tape
Thumb (ie, not rat-toothed) or mosquito forceps
Not Shown
Microscope
Clippers with #40 blade; on long-haired patients, it may be necessary to use 1 edge of the clipper to remove hair from a tiny area of skin.
Lactophenol cotton blue stain (optional)

Author Insight
The author prefers a small microspatula (pictured) for scraping. It has a longer edge than a blade, so a larger area can be sampled superficially, and a rounded end useful for deep scrapings. It is also sharp enough to do a proper scraping yet not so sharp as to cut the patient.
Method 1
Superficial Scraping (Figure 1)
The goal is to find parasites (eg, Sarcoptes scabiei, Cheyletiella spp, Demodex gatoi) that reside in the stratum corneum. Because these parasites can be present in small numbers, even in a severely affected pet, the key is to sample multiple sites. At each site, obtain material from a large surface area.

Superficial scraping of an erythematous, alopecic area over the elbow of a dog.
Author Insight
Scabies mites can be difficult to find. The best areas to scrape are typically crusty ear margins and crusty areas on the elbows or hocks.
Step 1
Place a few drops of mineral oil on the area to be sampled.
Step 2
Using a dulled #10 scalpel blade or microspatula held at a right angle to the skin, scrape broadly toward yourself and typically in the direction of hair growth. Scrape repeatedly in 1 direction; collect the superficial cells, including scale and crust, in a tiny pile on the skin at the edge of the area as you scrape. There is no need to scrape until blood is seen.
Step 3
Again using the blade or spatula, with a scooping motion, remove the skin debris and oil from the skin. Transfer to a microscope slide. Make sure to scrape all collected material onto slide for evaluation so as not to omit any potentially important sample material. Place a coverslip over the sample and examine with microscope.
Related Article: Superficial Skin Scrape
Method 2
Deep Scraping (Figure 2A)
The goal is to identify parasites that reside deep in the hair follicle—typically, Demodex spp (D canis, D cati, D injai, D cornei). To reach this depth, scrape until there is light capillary bleeding. Again, sample multiple body sites, but at each site only a small area of skin need be sampled.

Superficial scraping of an erythematous, alopecic area over the elbow of a dog.
Step 1
Roll or squeeze the skin firmly in the area to be sampled, as if trying to express the contents of the follicles.
Step 2
Place a drop of mineral oil on the area.
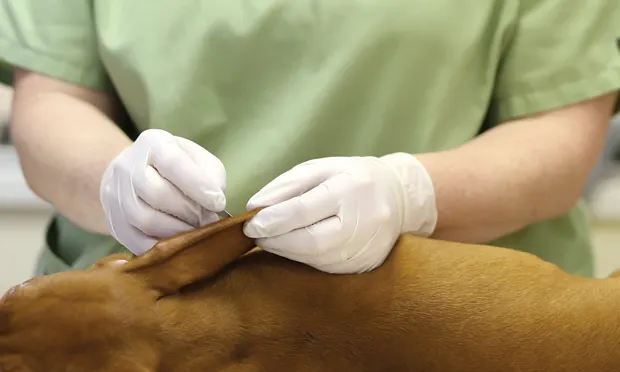
Approach 1. Hold the squeezed area of skin tensed flat with the fingers of 1 hand. With the other hand, using a blade or spatula held at a right angle to the skin, scrape repeatedly in 1 direction (in the direction of hair growth) across the tensed, flat area of skin. Continue scraping in a small area until there is light capillary bleeding, gathering the skin debris and oil onto 1 side of the area being scraped.
Approach 2. Hold the area to be sampled up in a pinch, and scrape across the top surface of the pinch (Figure 2B). Again, scrape repeatedly with the blade held at a right angle in 1 direction (in the direction of hair growth) until light capillary bleeding ensues.

Scraping across the top surface of the pinch.
Step 3
Using the blade or spatula, scoop the material and oil from the skin and transfer to a microscope slide. As with superficial skin scrapings, make sure to transfer all collected material onto the microscope slide for evaluation. Apply coverslip and examine with microscope.
Step 4
When examining, confirm that small drops of reddish material are present; this is blood (Figure 2C) and confirms the scraping was sufficiently deep.

Multiple Demodex spp mites along with reddish material, confirming a deep scraping.
Related Article: Deep Skin Scrape
Alternative Method to Deep Skin Scraping: Cellophane Tape Squeeze (Figure 2D)
An alternative to deep scraping, this method is reportedly more sensitive for finding parasites than is scraping,1 although the author does not always find this to be true. This method is often easier than a deep scraping, especially for an uncooperative patient or for difficult areas such as the face and feet.

Step 1
Place a drop of mineral oil on a microscope slide.
Step 2
Tear off a piece of clear cellophane tape, about 2 inches long.
Step 3
Press the sticky side of the tape firmly to the skin area to be sampled.
Step 4
Pinch up the taped skin and place fingers on top of the tape; roll and squeeze the skin firmly, as if trying to squeeze the follicle contents onto the sticky portion of the tape. Perform multiple “pinches” along the length of the tape strip if possible.
Step 5
Remove the tape and place sticky side-down onto the drop of oil on the slide.
Step 6
Examine with microscope. There is no need to apply a coverslip.
Author Insight
A recent conference presentation2 suggested that, in some cases, mites may be easier to identify by placing the tape strip onto a drop of lactophenol cotton blue stain, instead of mineral oil, on the slide. In this case, the background is a deep blue color, whereas Demodex spp mites remain clear and transparent, thus easier to see (Figure 2E).

D canis adult and egg, tape preparation mounted on lactophenol cotton blue; blue background makes mites easier to distinguish from debris (×40 objective).
Method 3
Trichogram (Figure 3)
A trichogram, or hair plucking, can be an excellent way to identify parasites that reside deep in the follicle (eg, D canis) or those that often attach to hair shafts (eg, Demodex spp mites in cats). The author always recommends performing a trichogram in addition to scrapings; it is an especially valuable technique in areas that are difficult to scrape (eg, interdigital area, plantar area of the foot, around the face and eyes). Some fractious or active patients may tolerate this diagnostic technique better. It is reported to be as effective as the tape-and-squeeze method above.3

Demodex spp mites at the root of a plucked hair (×10 objective).
Step 1
Place a drop of mineral oil on a microscope slide.
Step 2
With non-toothed forceps, grasp a small tuft of hair and quickly pull out. Aim for 2 to 5 hairs per “pluck.” Repeat 1 or 2 more times.
Step 3
As hairs are plucked, they should be deposited in the mineral oil on the slide.
Step 4
Place coverslip and examine with microscope. Pay special attention to the root and base of the hair shafts, which come from deep in the follicle where the mites are located.
Author Insight
When examining any skin scraping, tape, or trichogram specimen, position the microscope condenser in the low position (ie, not up next to the slide as would be typical for examining a blood smear). This increases the contrast in the field and makes parasites more easily visible. Use the ×4 objective first to scan the slide, increasing to the ×10 objective as necessary for any suspicious areas. Scan the entire slide; flowing oil may move the mites.
Related Article: Treatment of Demodicosis in Dogs & Cats