How to Place a Chest Tube
Overview
Placement of a temporary indwelling chest tube is a relatively easy and effective way to evacuate the pleural space. Indications for chest tube placement include persistent conditions requiring repeated thoracocentesis, tension pneumothorax, and postoperative thoracotomy.
The Tube
Size. Choose an appropriately sized tube by evaluating the mainstem bronchus size on thoracic radiographs, palpating the intercostal space, and weighing the patient. See the table for general guidelines on the sizes of tubes to be used for dogs and cats of various body weights. Drainage of more viscous fluids, such as those associated with pyothorax, may be facilitated by a larger diameter tube.
_Fenestration._Commercially available chest tubes have holes. (Figure) Premeasure the tube and mark it from the 10th intercostal space to the ipsilateral elbow. Additional holes may be made, but if so must not compromise the integrity of the tube. To prevent weakening, individual holes should not incorporate more than 25% to 30% of the tube circumference. Place them in the area intended to remain within the pleural space. If the tube has a radiopaque line, place the final hole over this area for ease of radiographic identification.
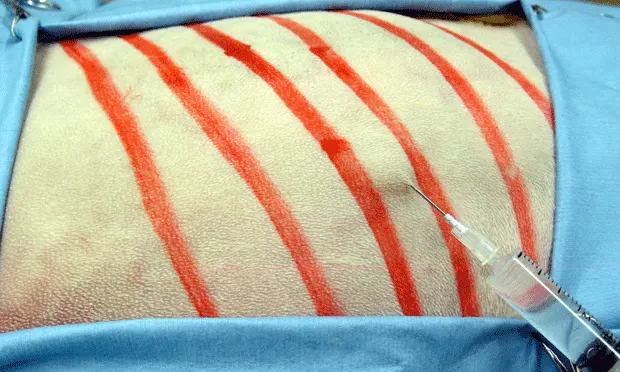
Step 1. Place animal in lateral recumbency.
The side facing up is intended for drain placement.
(1a.) Perform a wide clipping of haircoat with aseptic preparation of skin from approximately 5th through 12th intercostal spaces.
(1b.) Identify mid-thoracic region for approximate tube placement. If air is suspected, place tube approximately two to four finger widths below spine. If fluids are suspected, place tube two to four finger widths above sternum. Alternatively, the chest drain can be placed in the middle of the chest (dorsal/ventral).
Step 2. Anesthetize patient.
One of two anesthetic techniques can be used.
Technique 1
Local infiltrative block.(2a.) To desensitize skin, place several small subcutaneous blebs in areas intended for incision (intercostal space 10). Anesthetic may be introduced into the intercostal muscle in the area intended for tube penetration, cranial to incision site (intercostal space 7).
Technique 2
Intercostal block or line block. (2b.) Make several injections through skin and muscle along the 7th intercostal space.
Procedure Pearl: Tube evacuation can be intermittent or continuous depending on the circumstances and is essential if the patient becomes tachypneic or dyspneic.
Step 3. Make the incision.
This can be done in two ways.
Technique 1(3a.) Using a surgical blade, create a full-thickness skin incision over 10th intercostal space at site of local anesthesia. Insert tip of trocar through skin incision (3b.) and advance trocar cranially through subcutaneous tissues/space to 7th intercostal space (3c.).
Procedure Pearl: Chest tube placement is a painful procedure, making an appropriate anesthetic protocol essential.
Technique 2
Gently grasp and retract skin from over 10th intercostal space, advancing incision site cranially to 7th intercostal space. Using a surgical blade, create a full-thickness skin incision over 7th intercostal space. The surgical blade may be used to incise the underlying intercostal muscles at this time. Insert tip of trocar through skin and muscle incision.
Step 4. (4a.) Redirect trocar into vertical position to be almost perpendicular with thoracic wall. Direct penetration toward patient's opposite elbow.
(4b.) With one hand, grasp trocar just 2 to 3 cm above skin to stabilize it and avoid overpenetration into thoracic cavity.
Place palm of other hand over head end of stylet. Apply firm, consistent pressure, and in a single motion advance trocar tip through intercostal space. Considerable pressure is needed to penetrate through intercostal muscles. To avoid lung trauma, we advocate incising through skin and intercostal muscles. Once through pleura, reduce angle of trocar so it is parallel with ribs. Back stylet out of tube very slightly by twisting it. Advance entire tube and stylet cranially to the predetermined distance.
Step 5. Once tube is in place, stylet may be withdrawn. However, before withdrawing stylet completely, clamp tube to prevent iatrogenic pneumothorax.
(5a.) We recommend using the handle portion of a hemostat, rather than the jaw, to occlude the tube lumen to avoid damaging the tube. A nylon tube clamp may be inserted over the plastic tubing once the stylet has been removed. This also protects against pneumothorax during chest tube management and should be closed unless the pleural space is being evacuated.
Procedure Pearl: The chest wall in cats is much more compliant than in dogs. In our experience, considerable pressure is needed to penetrate a flexible structure with either a trocar or hemostat. In contrast, the chest walls of large-breed dogs are not very compliant.
Step 6. (6a.) Place a tube adaptor into end of tube and secure it with suture or tissue glue. Attach 3-way stopcock to tube adaptor, and close remaining two ports with injection caps.
Step 7. To stabilize tube, place purse-string suture at skin incision, leaving long suture tags. These tags may be used to make a Chinese finger trap or Roman sandal pattern. An alternative is to create a "butterfly," using 1-inch white tape around the tube, just distal to the purse-string suture. Wings of the butterfly must be long enough to avoid penetrating tube when suturing tape to the skin. Lastly, a second suture may be placed several inches caudally, further anchoring tube to skin.
8. Before bandaging the chest drain, take thoracic radiographs to confirm tube placement.
(8a.) Cover skin wound with antiseptic ointment and sterile gauze squares. Create thoracic wrap using layers of gauze covered with Vetrap (3M, St. Paul, MN) to further protect the drain. Change entire wrap daily. At this time, examine skin incision for signs of infection and check tube placement.
Chest drain removal can generally be performed without sedation and a thoracic wrap applied as mentioned in Step 8.
Tube Management
Patients must be monitored hourly for changes in respiratory rate and effort. Initially, material in the tube should be evacuated every 1 to 2 hours, and negative pressure should be verified at the end of every treatment. Evacuation must be repeated if the patient becomes tachypneic or dyspneic at any time. The interval between evacuations may be increased over several days if less fluid/air is removed.
Intermittent suction may be applied using a large syringe (35 or 60 ml) attached to the 3-way stopcock and is ideal in small dogs and cats and patients with relatively slow accumulation of fluid or air. Continuous suction is indicated in larger dogs, in patients with large- and rapid-volume accumulation, and when negative pressure is not achieved during intermittent evacuations. A Pleur-evac (Genzyme, Fall River, MA) may be used. Patients requiring continuous suction should be referred to a 24-hour facility for intensive monitoring. Heimlich valves are a one-way valve system that is difficult to maintain. We do not recommend their use in veterinary patients.
Air bubbles or continuous leaks may occur if the tube connections are not tight. Likewise, air may leak into the pleural space, creating pneumothorax. Kinking, twisting, clots or other occlusion of the fenestrations may impede evacuation. Tubes may migrate within the thoracic cavity or migrate backward if not secured to the skin.
_Tube Selection_Weight of Animal (kg) Tube Size (French)< 7 14-167-15 18-2216-30 22-28> 30 28-36